

How to use the PDF converter in Smallppt?
Updated over 2 months ago
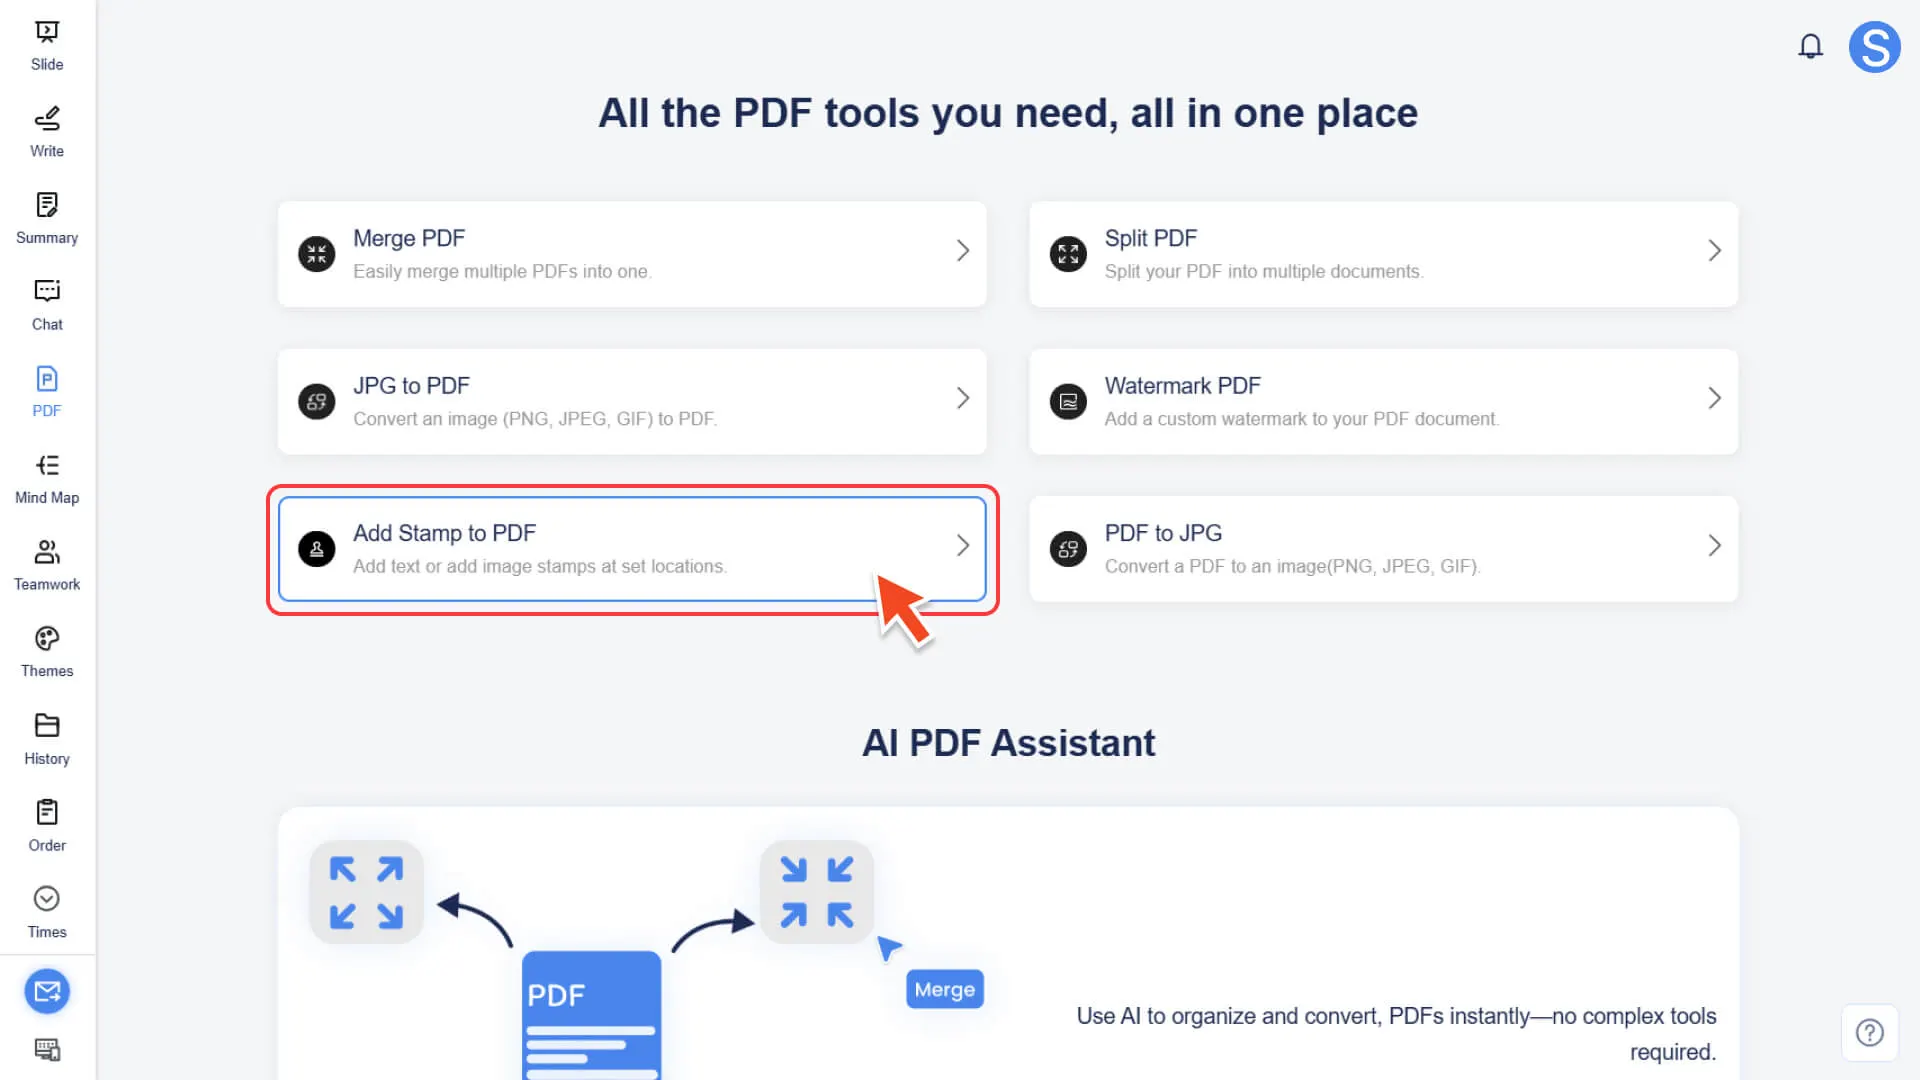
How to use the PDF converter in Smallppt?
Step 1: Enter the PDF Converter
1. Open the Smallppt dashboard and find AI PDF in the left navigation bar.
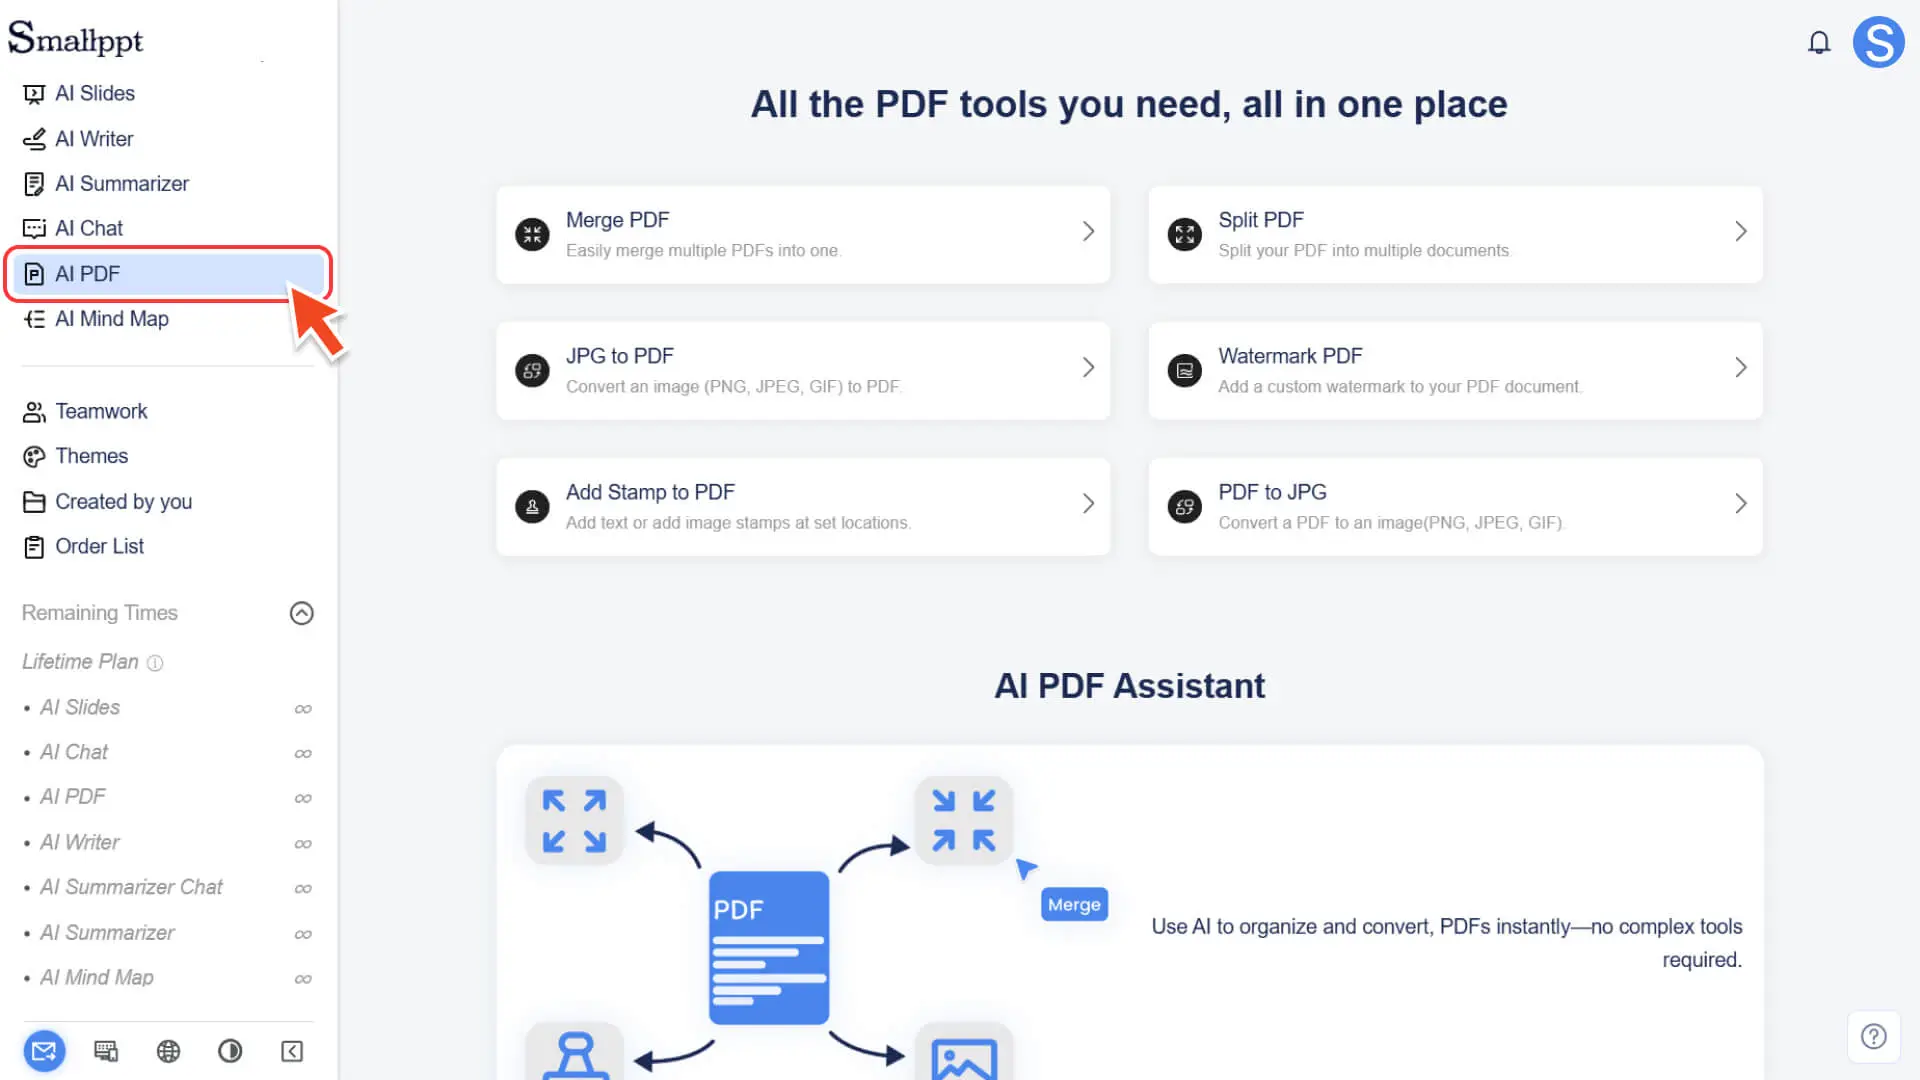
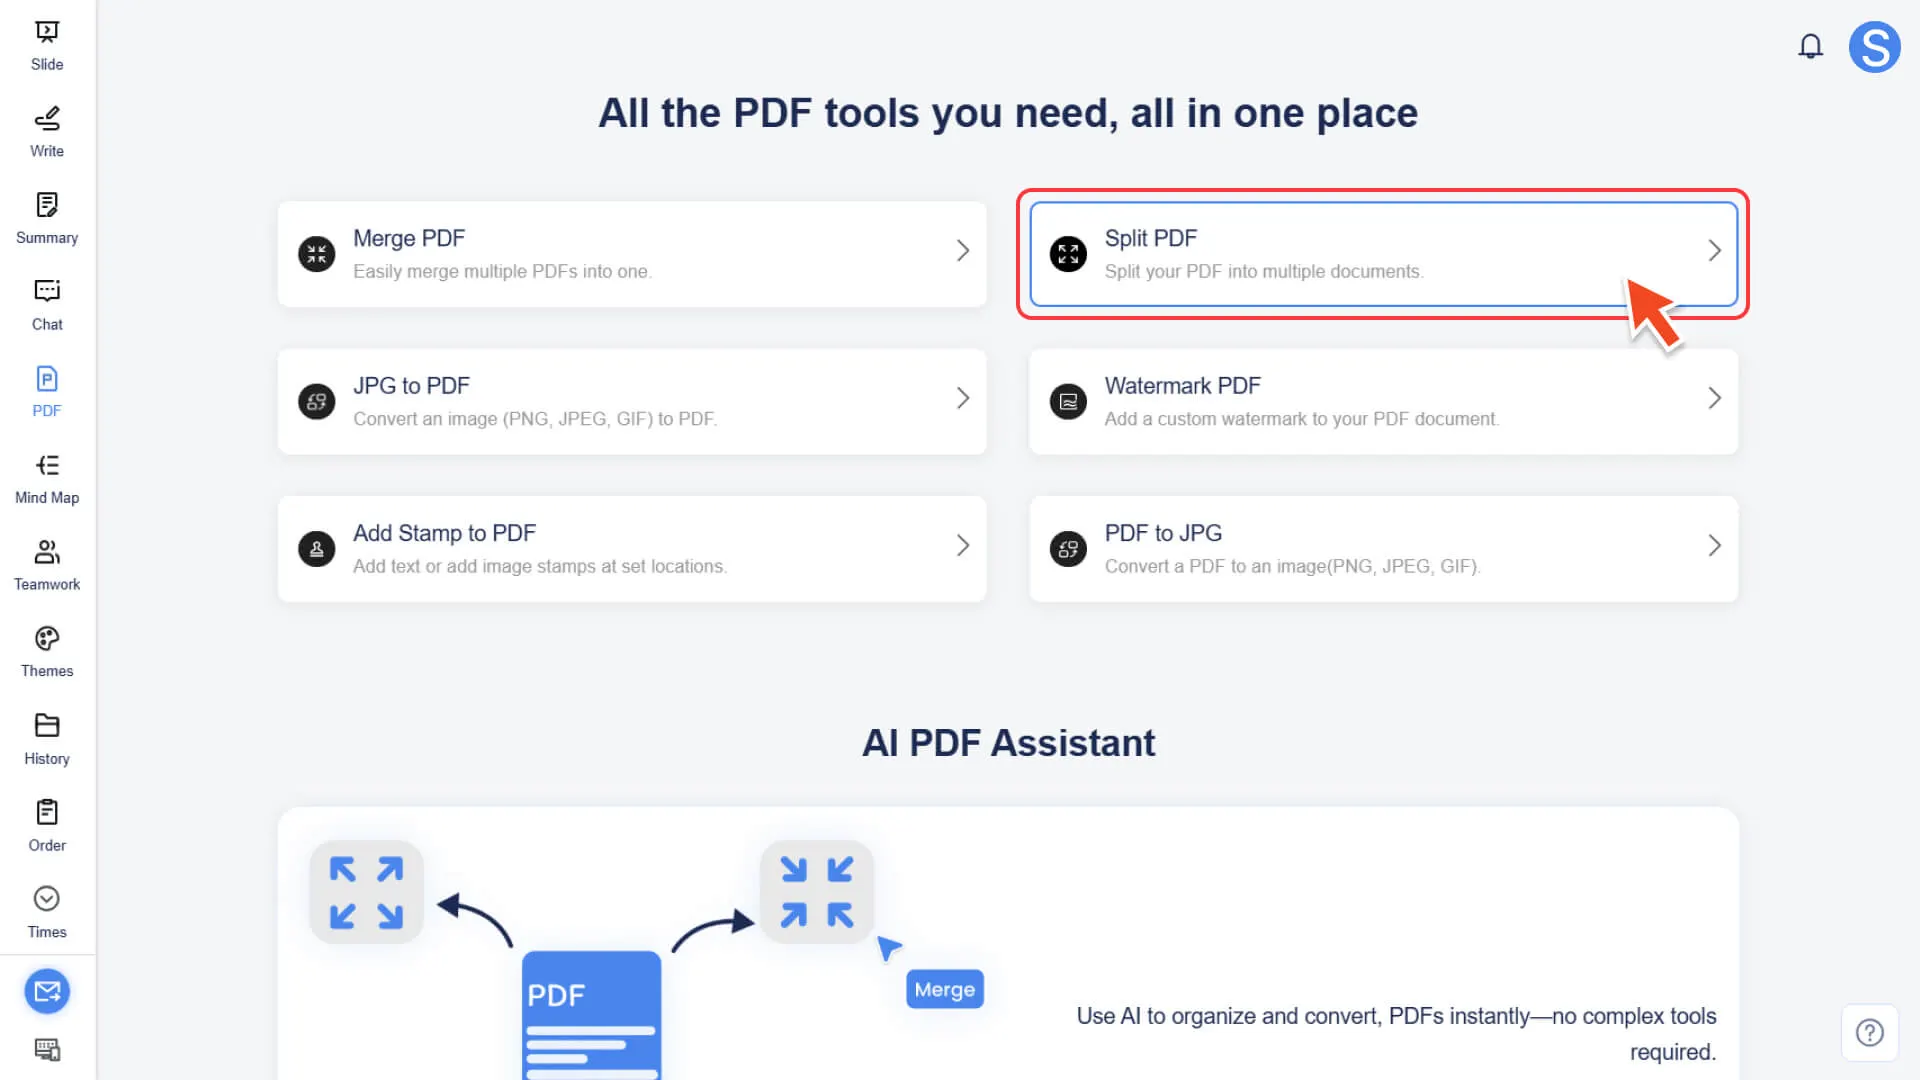
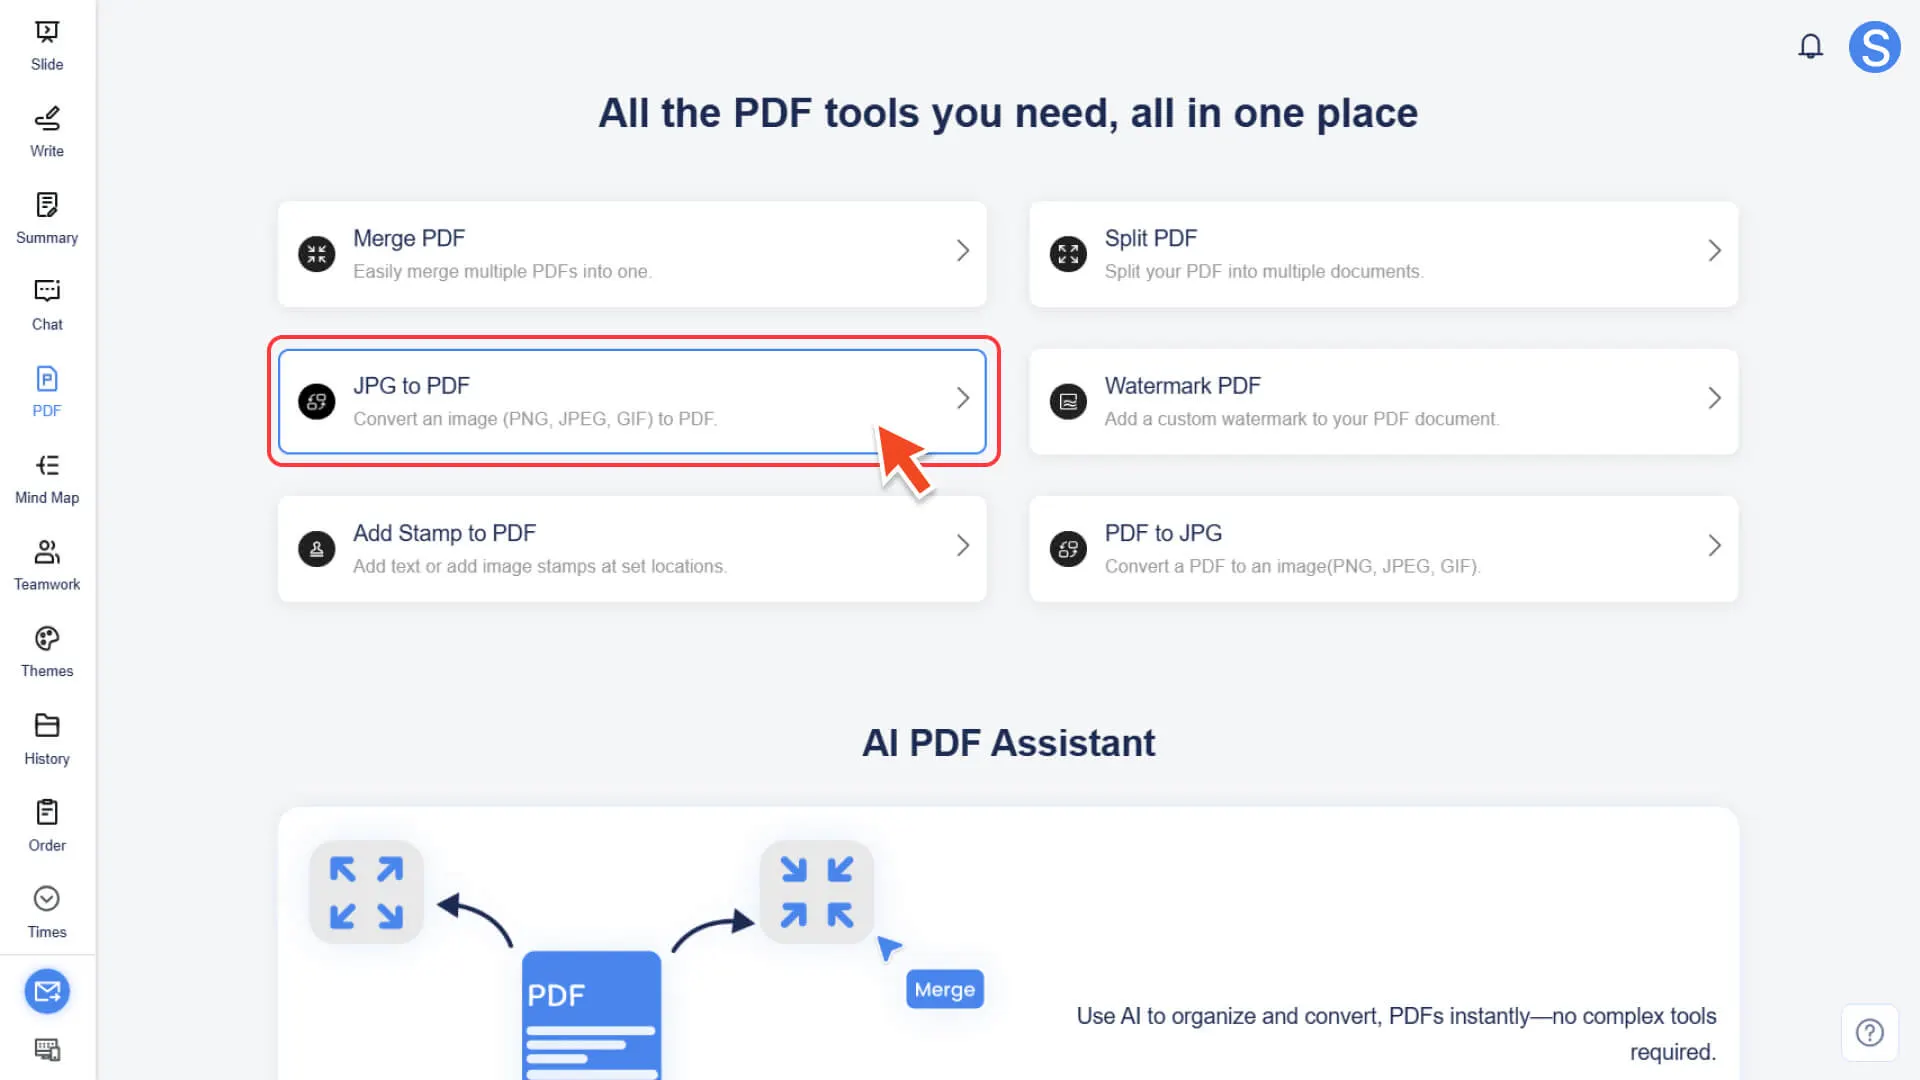
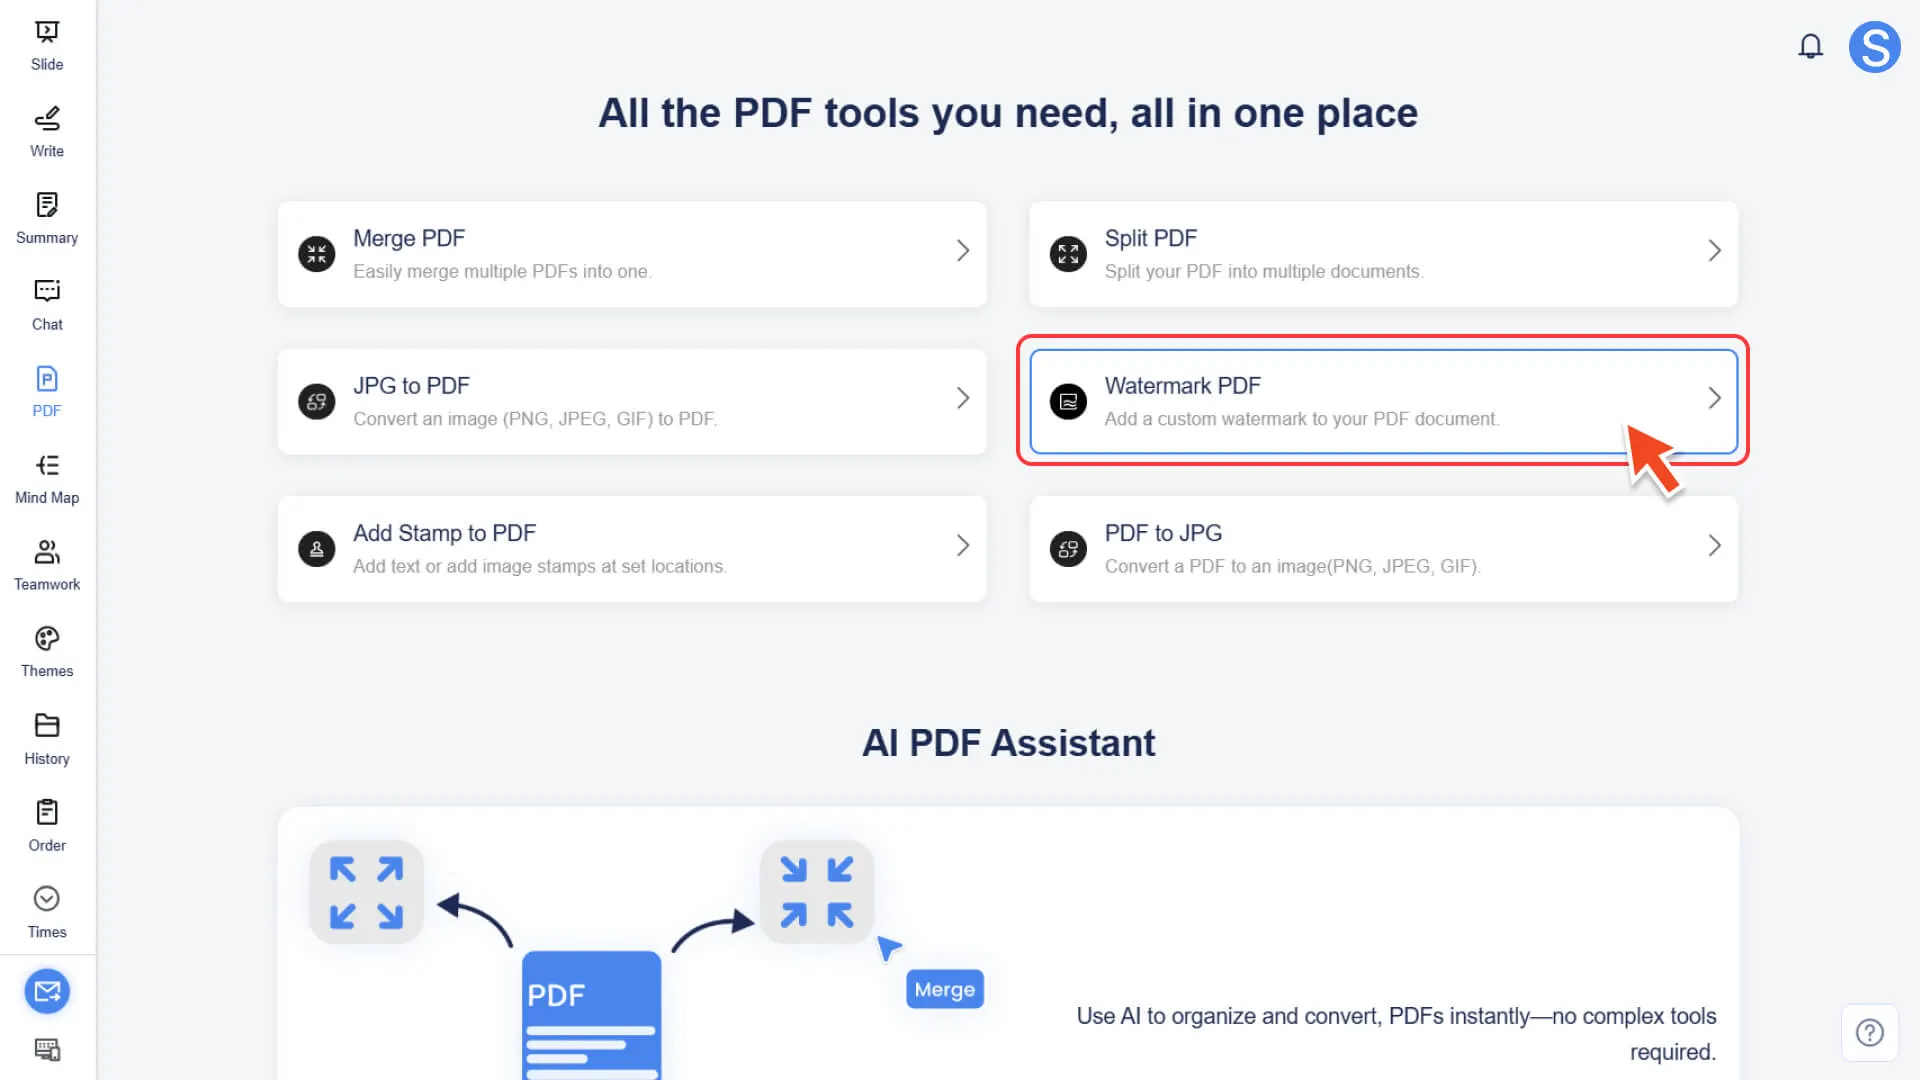
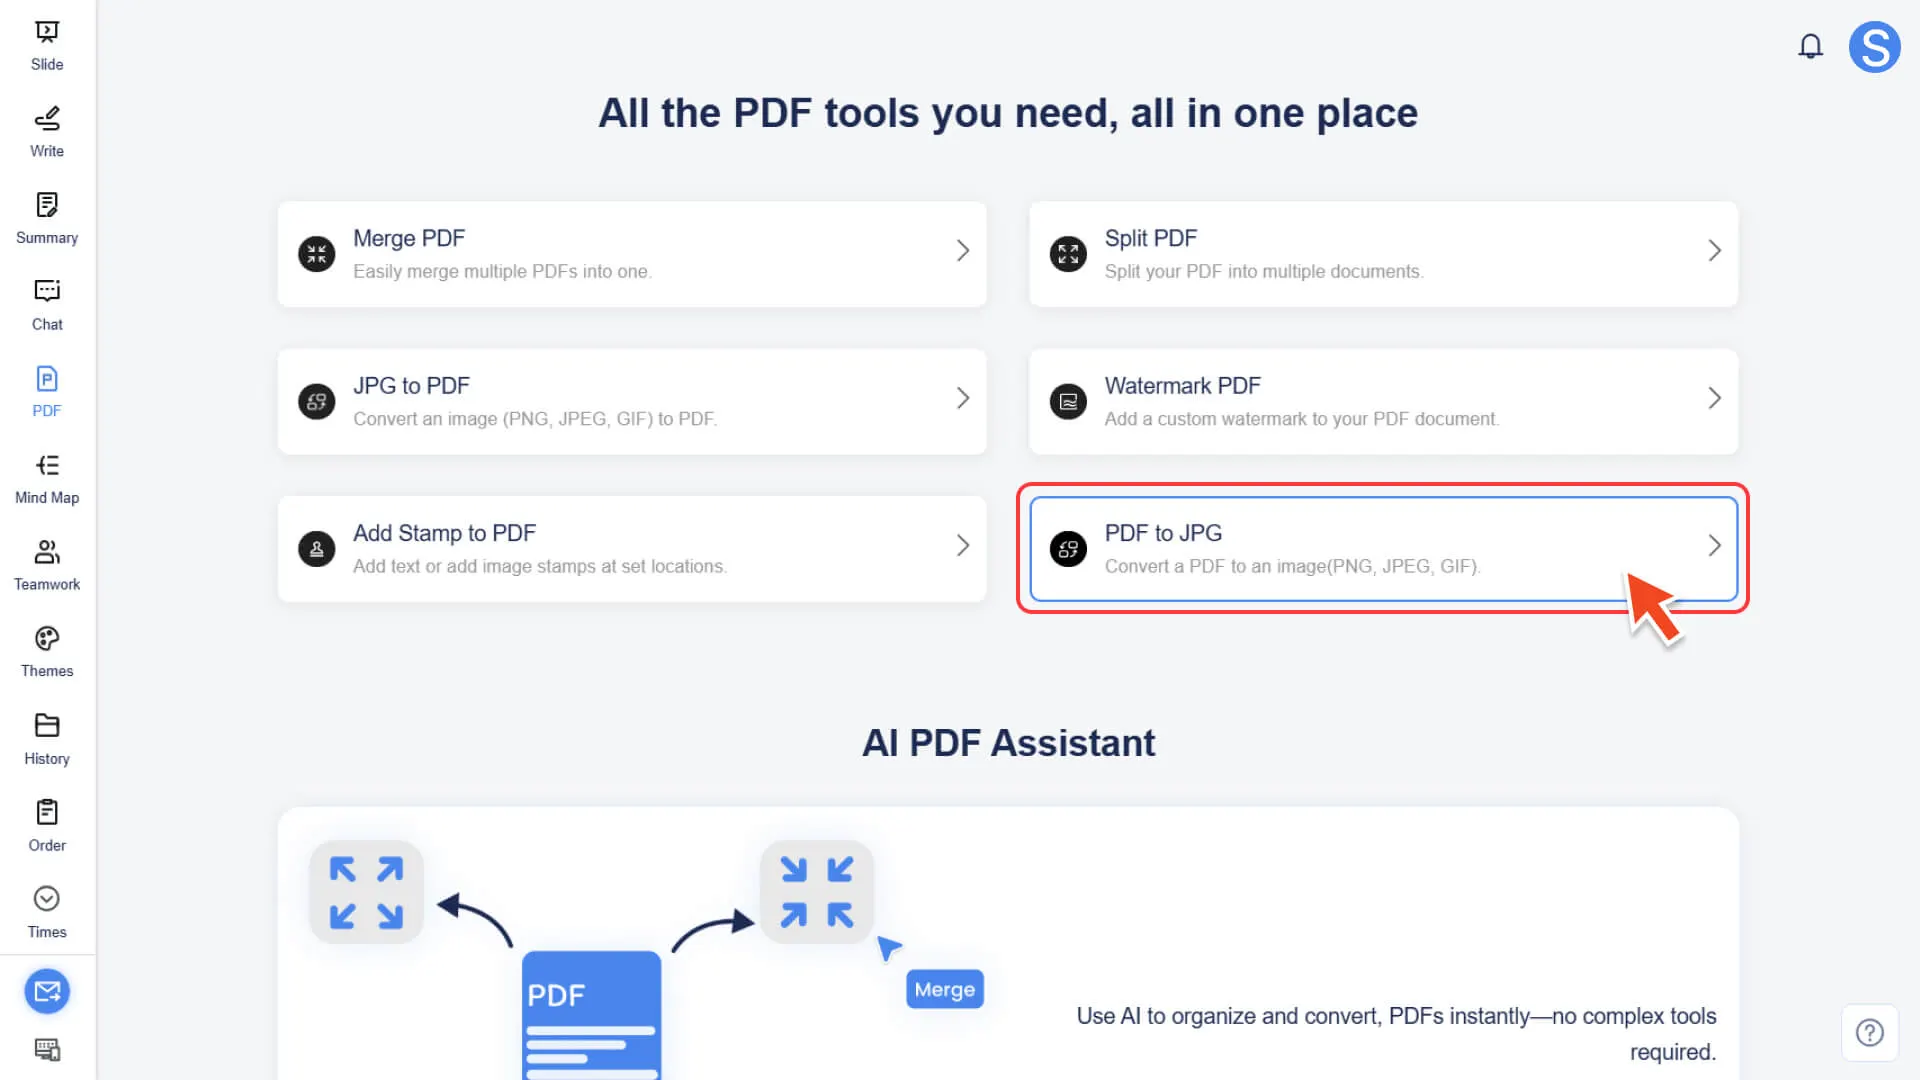
2. Click to view all PDF tools, including:
◦ Merge PDF: Combine Multiple PDFs
◦ JPG to PDF: Convert Images to PDF (Supports Batch Conversion)
◦ Add Stamp to PDF: Add custom text or image stamps
◦ Split PDF: Split PDF
◦ Watermark PDF: Add Custom Watermark
◦ PDF to JPG: Convert PDF to Image (Supports Multiple Download Formats)
Step 2: Core Operation Process
• Regardless of which tool is selected, the operation process remains consistent and simple: select a tool → upload a file → set parameters → generate and download
How to merge multiple PDF files
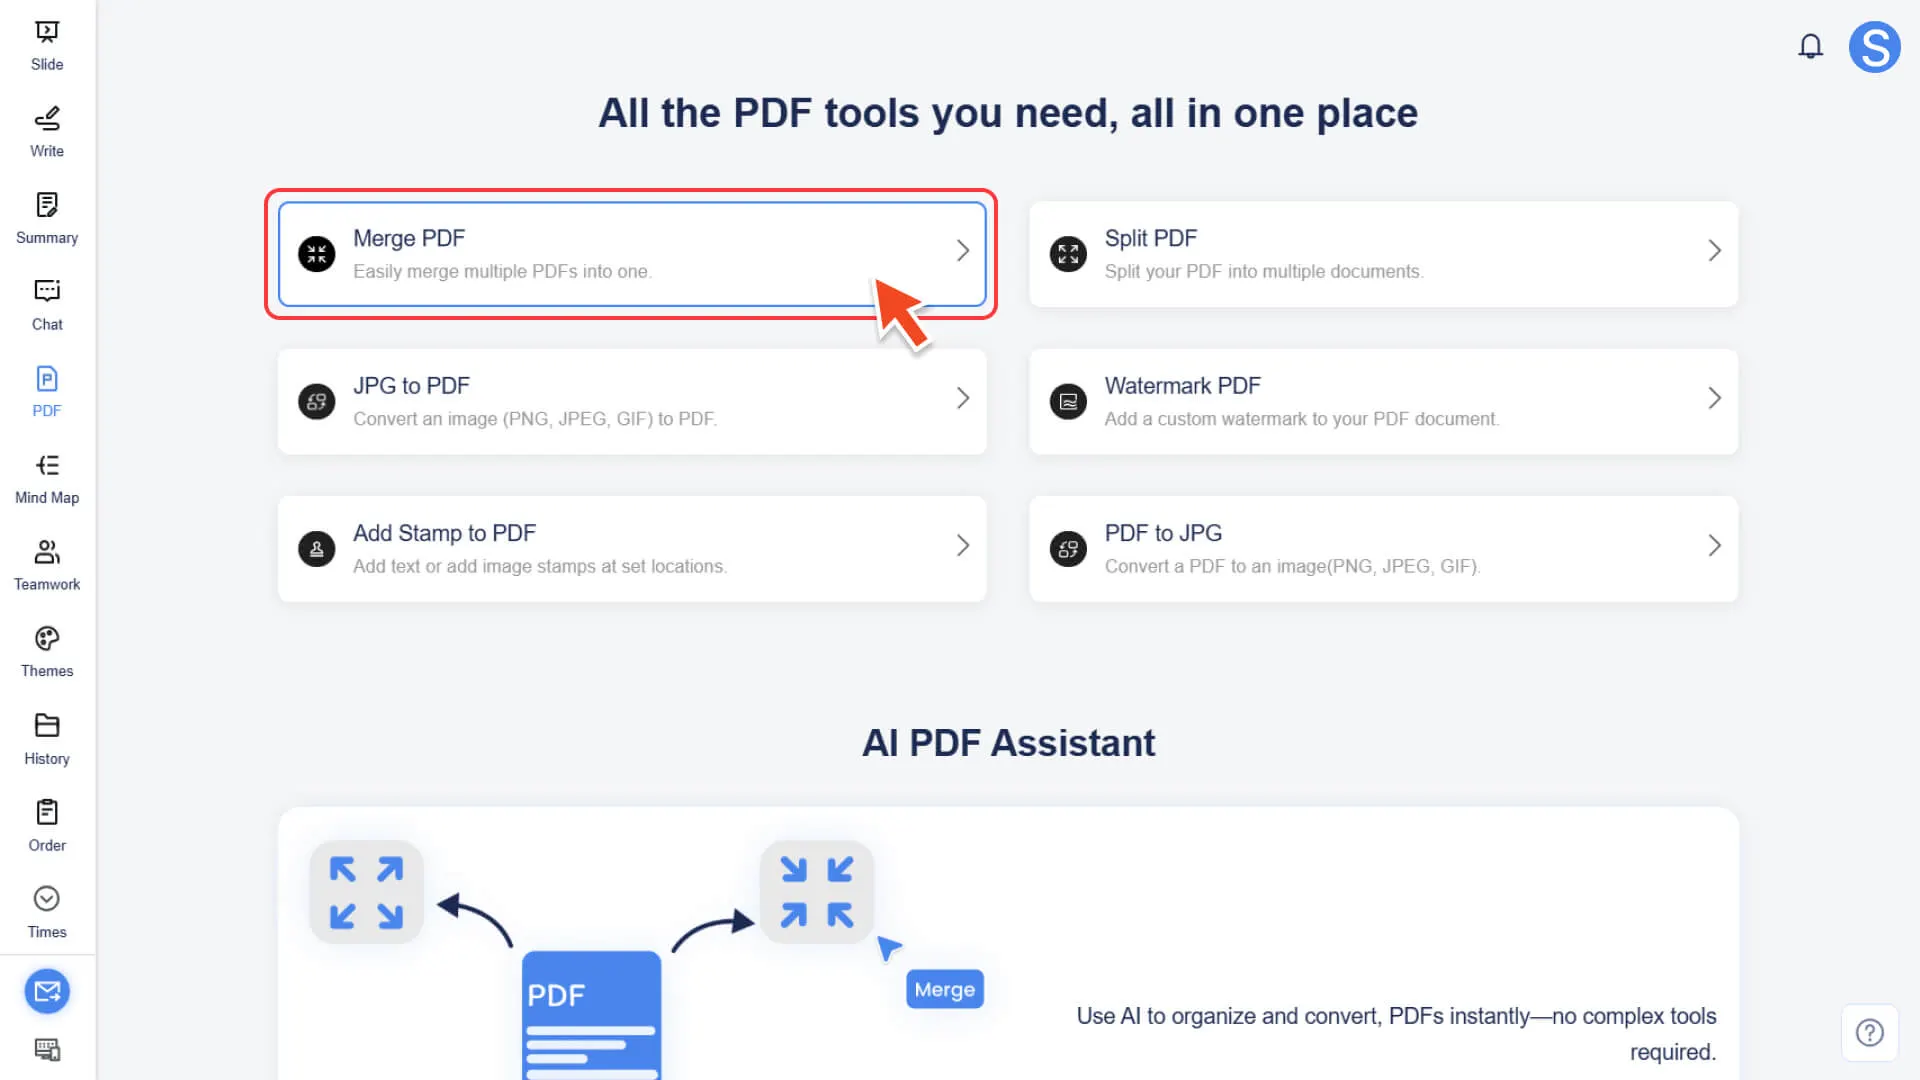
Step 1: Enter the Merge PDF tool
• Select the Merge PDF feature in the AI PDF module.
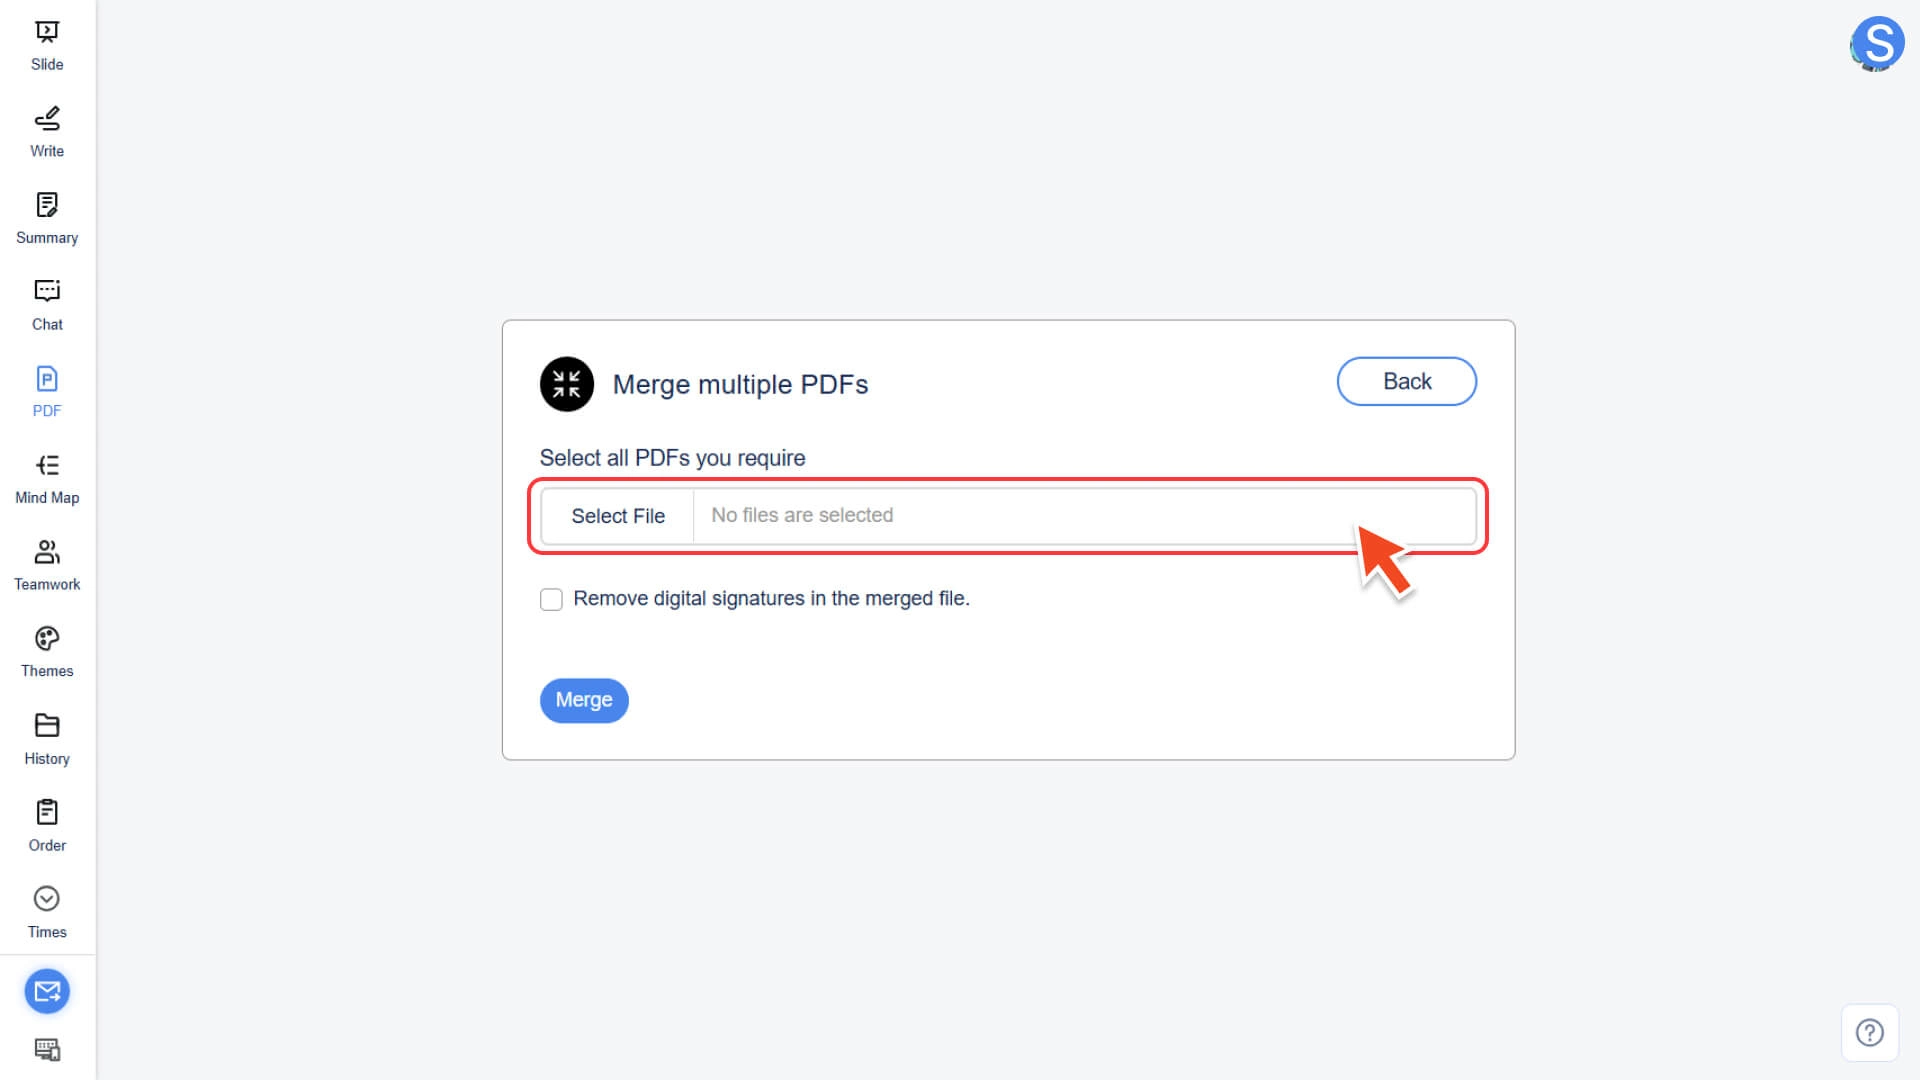
Step 2: Upload and Sort Files
• Click the Select File button.
• Upload at least 2 PDF files to be merged.
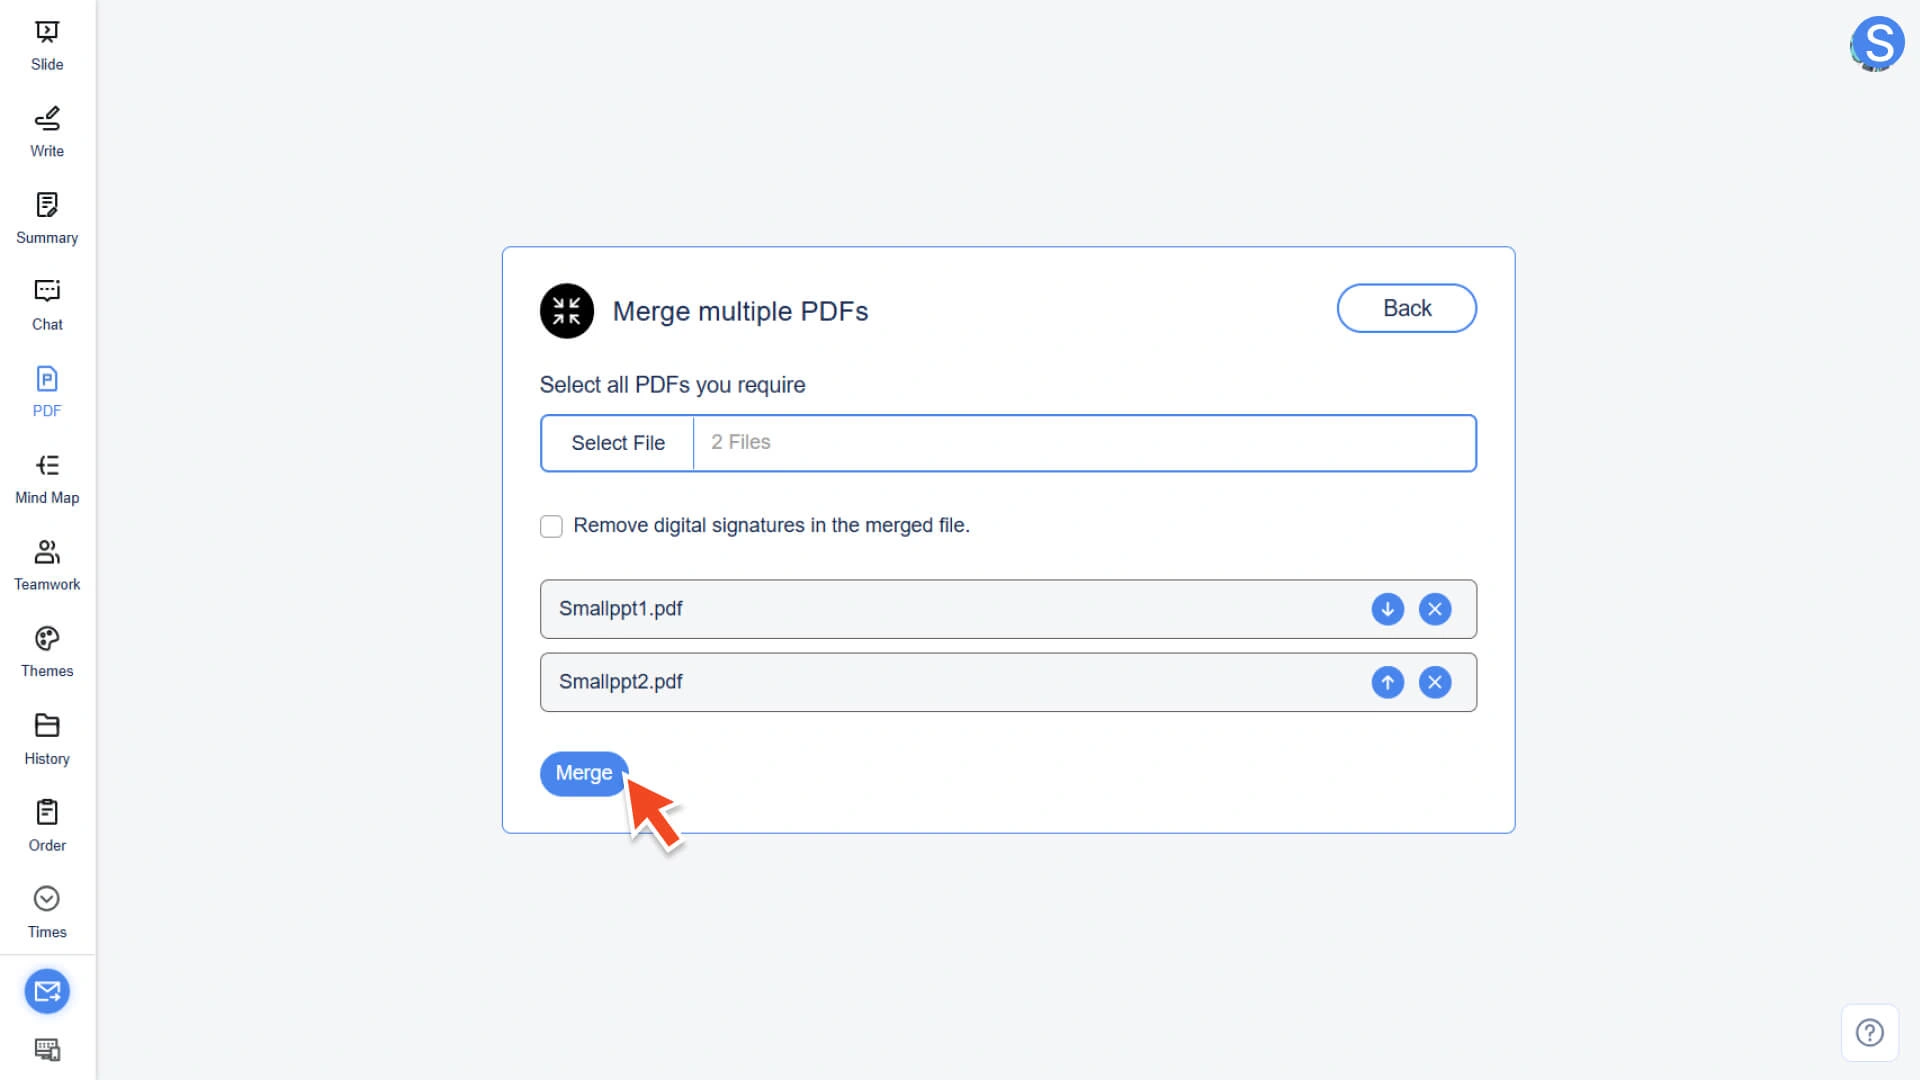
• (Optional) Drag the file list to adjust the final merge order.
Step 3: Perform the merge operation
• After confirming that the file list is correct, click the Merge button.
• The system will immediately start merging and generating a new PDF file.
Step 4: Complete and Download
• Waiting for the system to finish processing.
• Download the merged final PDF file.
How to Split PDF Files
Step 1: Enter the Split PDF Tool
• Select the Split PDF feature in the AI PDF module.
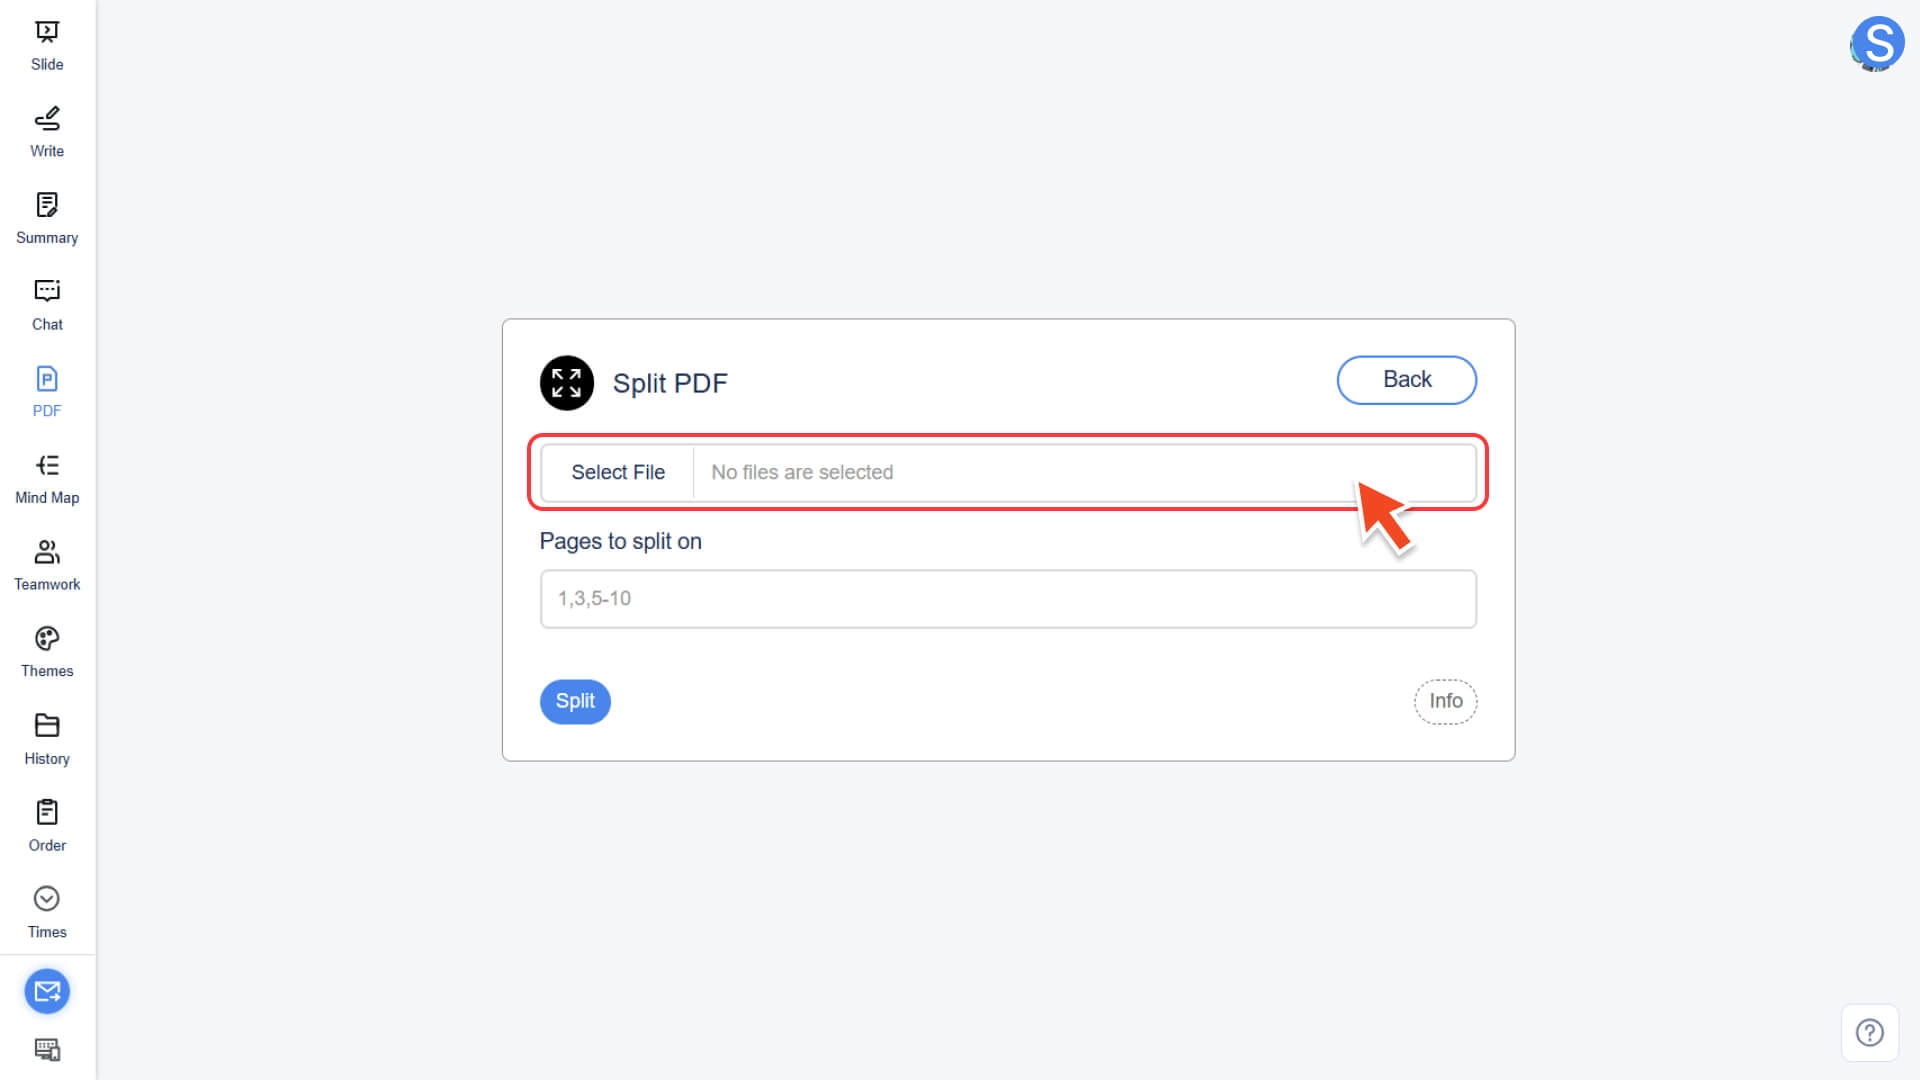
Step 2: Upload PDF file
• Click the Select File button to upload the PDF document that needs to be split.
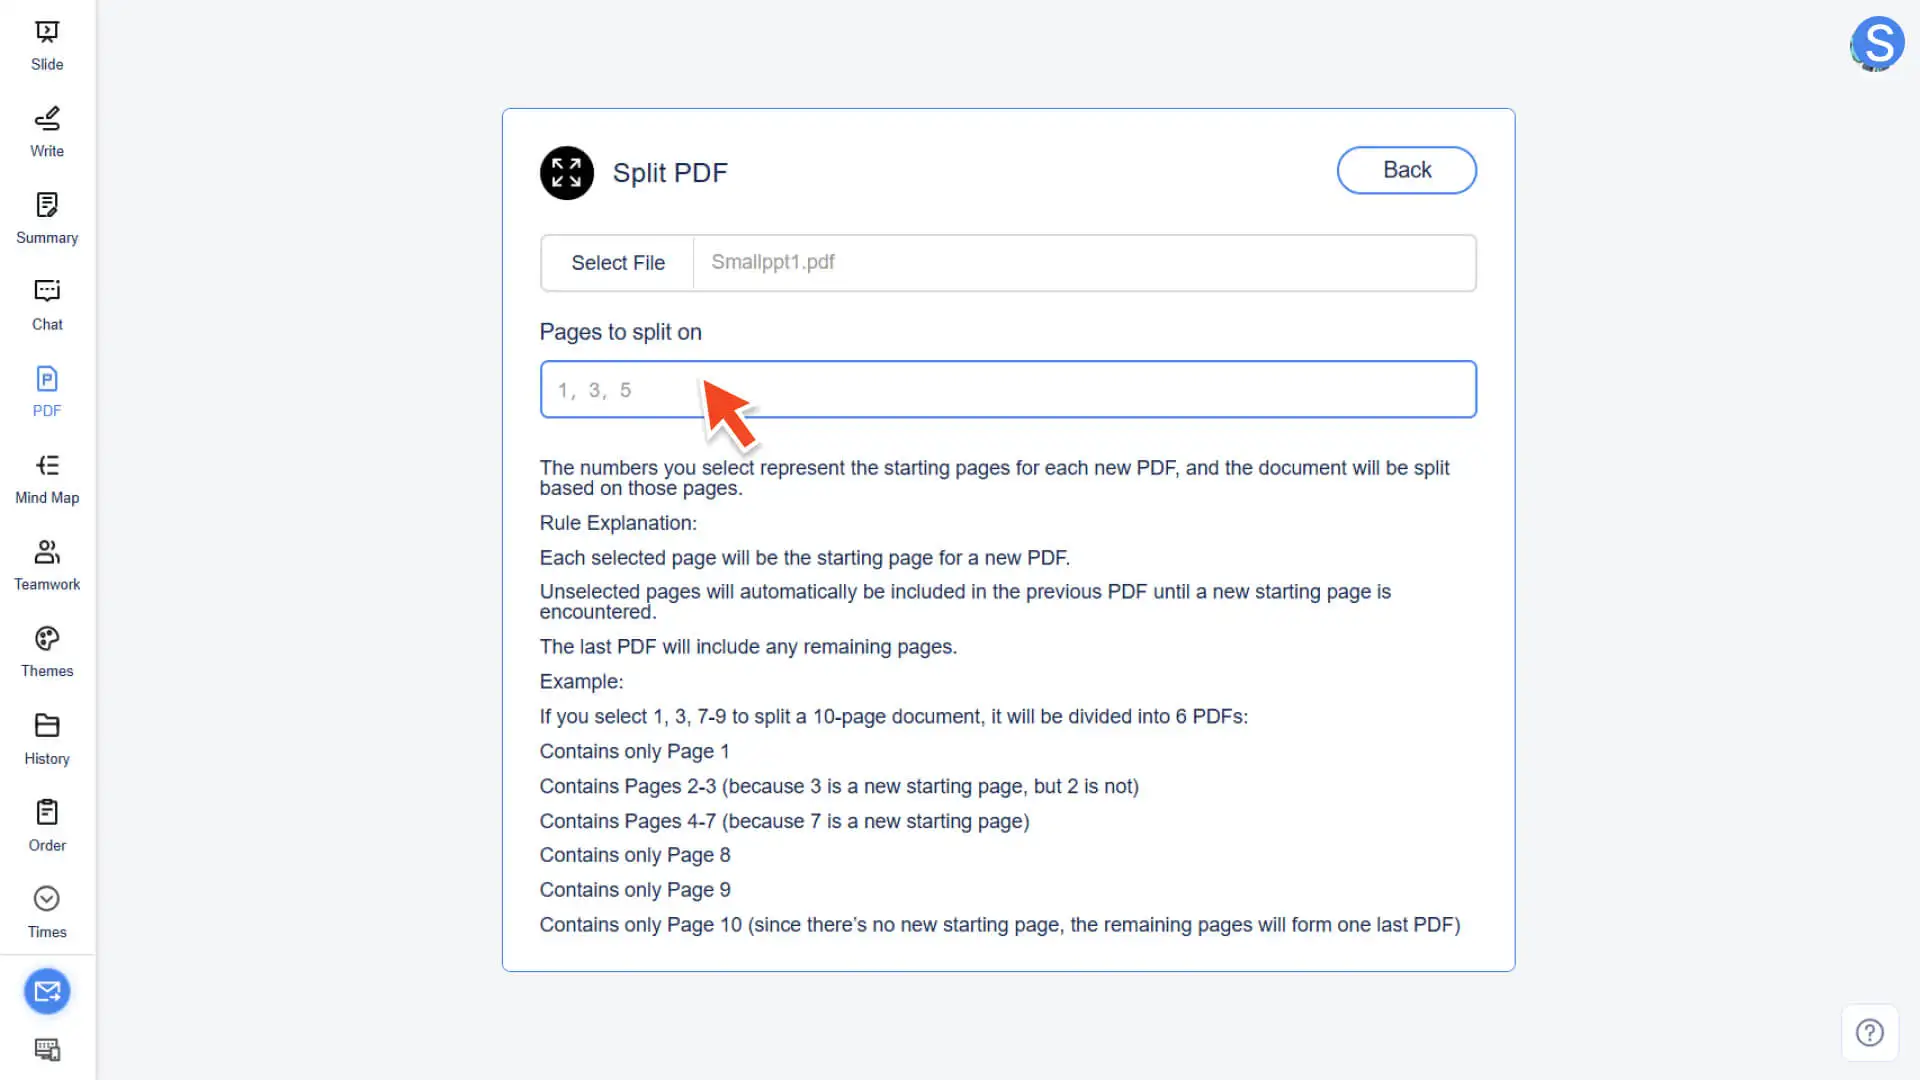
Step 3: Set the starting page number for splitting
• Enter the page numbers you wish to use as the "starting page of the new PDF file" in the input box, for example: 1, 3, 7.
• Splitting Logic: The system will automatically split the document into multiple files starting from the selected page number, with the remaining pages being included in the previous split section.
Step 4: Execute and download the file
• Click the Split button, and the system will automatically generate multiple split PDF files.
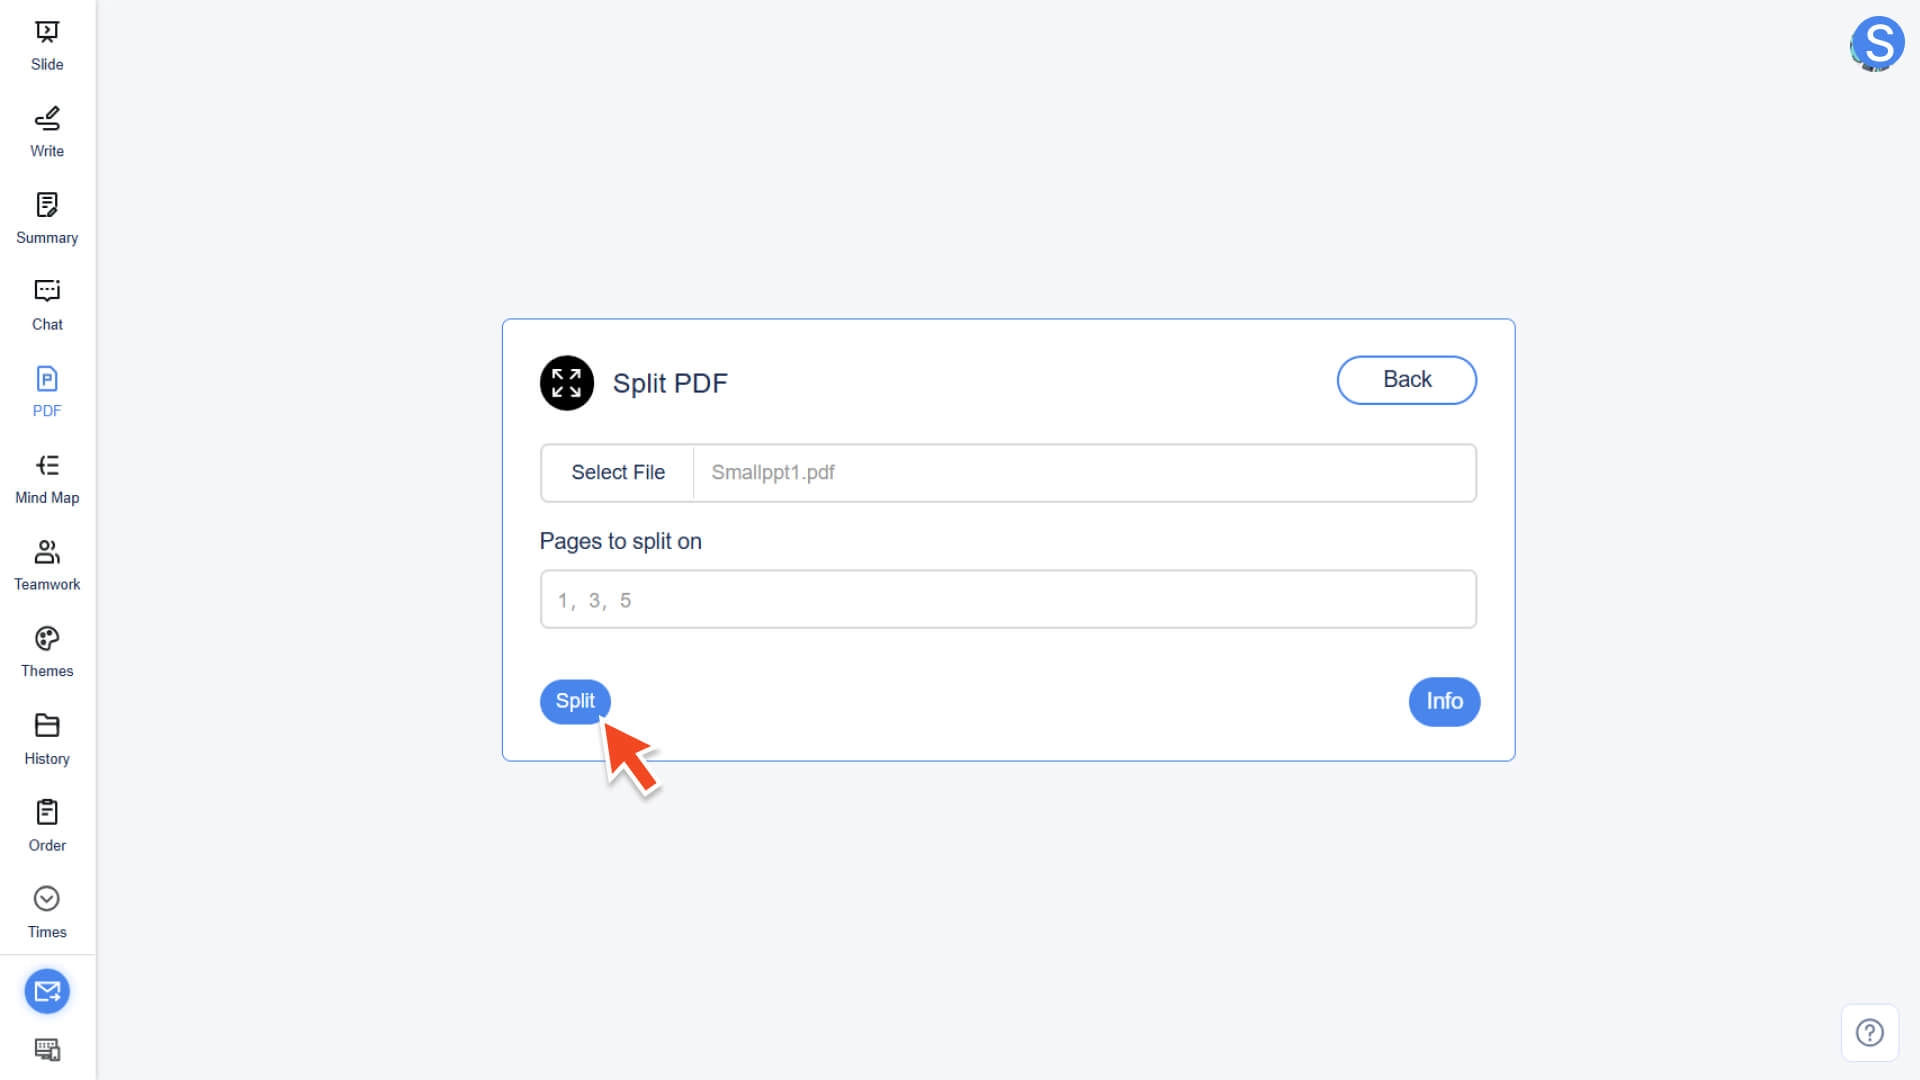
• Download the completed file to use it.
How to Convert Images to PDF
Step 1: Enter the conversion tool and upload the image
• Select the JPG to PDF function in the AI PDF module.
Step 2: Set up multi-file processing logic (optional)
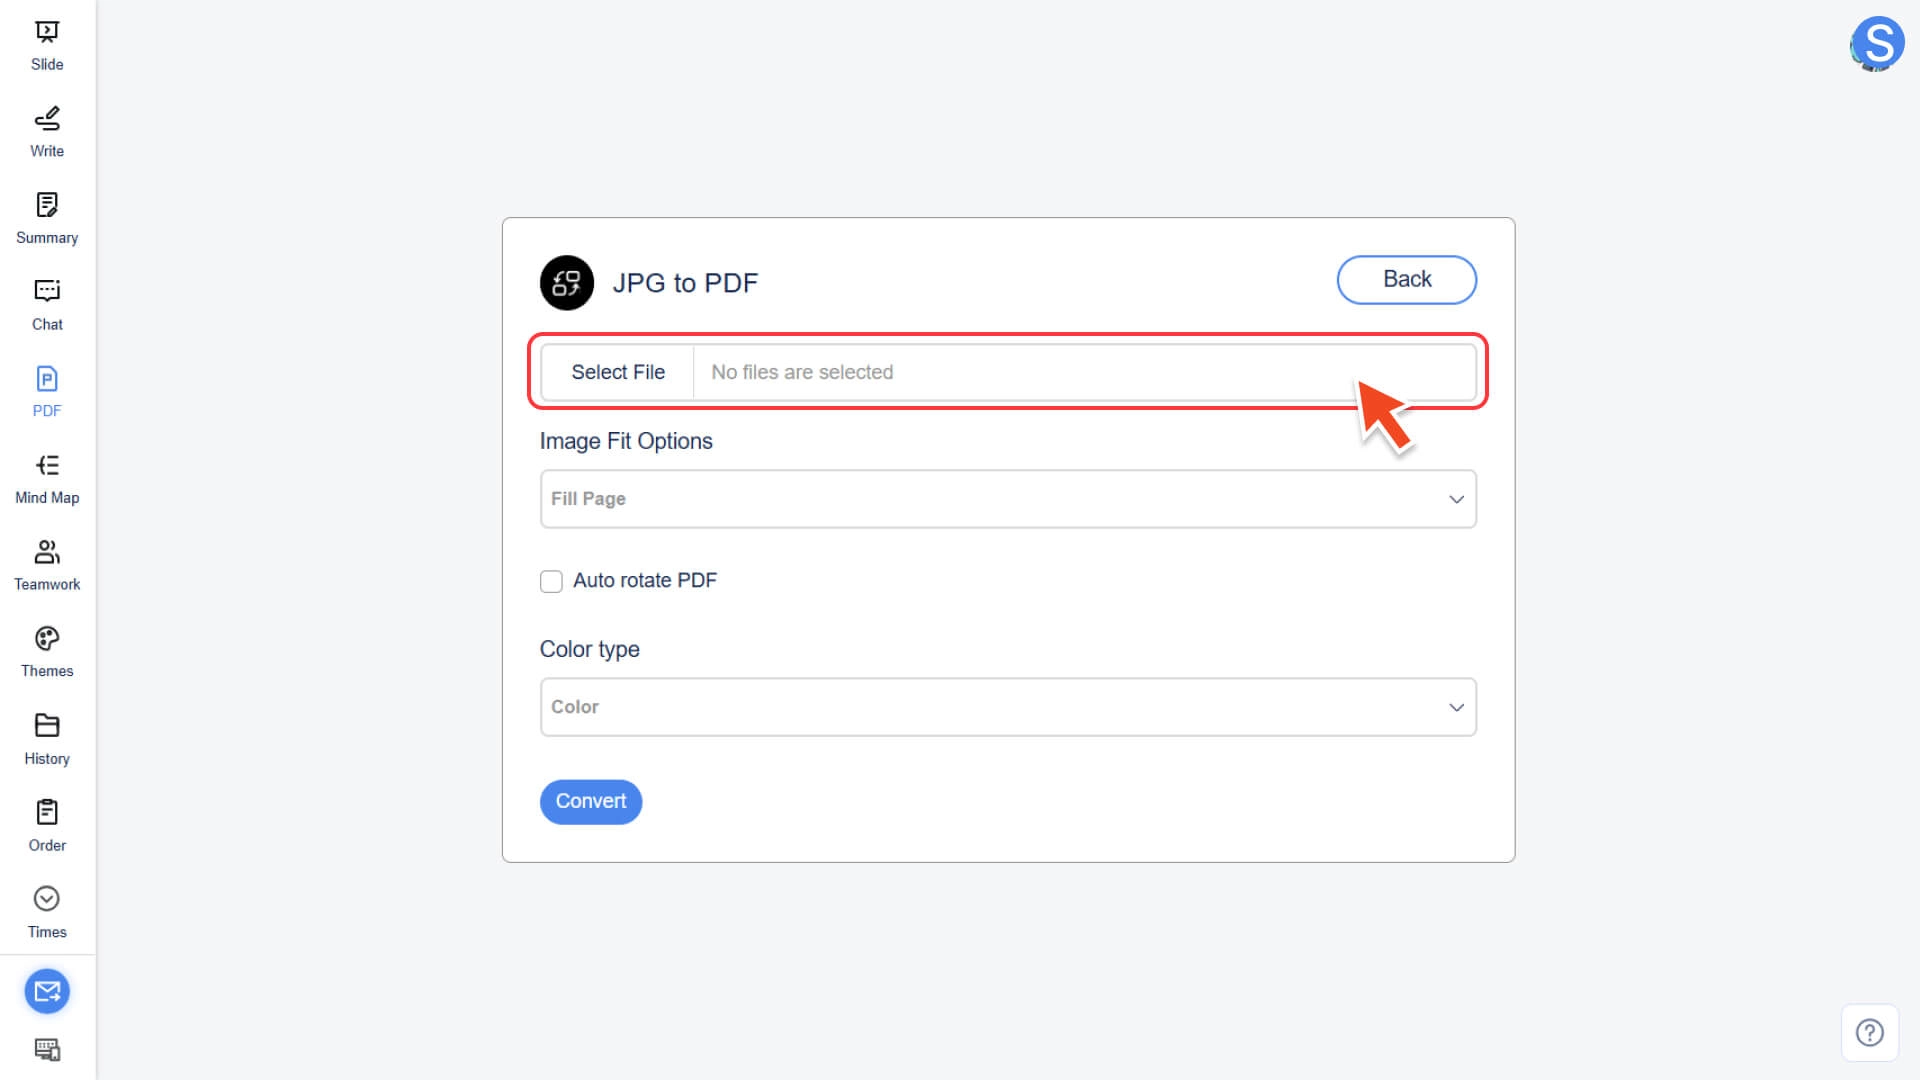
• Click Select File to upload one or more images. The system supports batch uploading of multiple image formats.
◦ Merge into single PDF: Combine all images into one PDF document
◦ Convert to separate PDFs: Each image is converted into a separate PDF
Step 3: Adjust PDF output parameters
You can adjust other parameters as needed to optimize the display effect of the PDF:
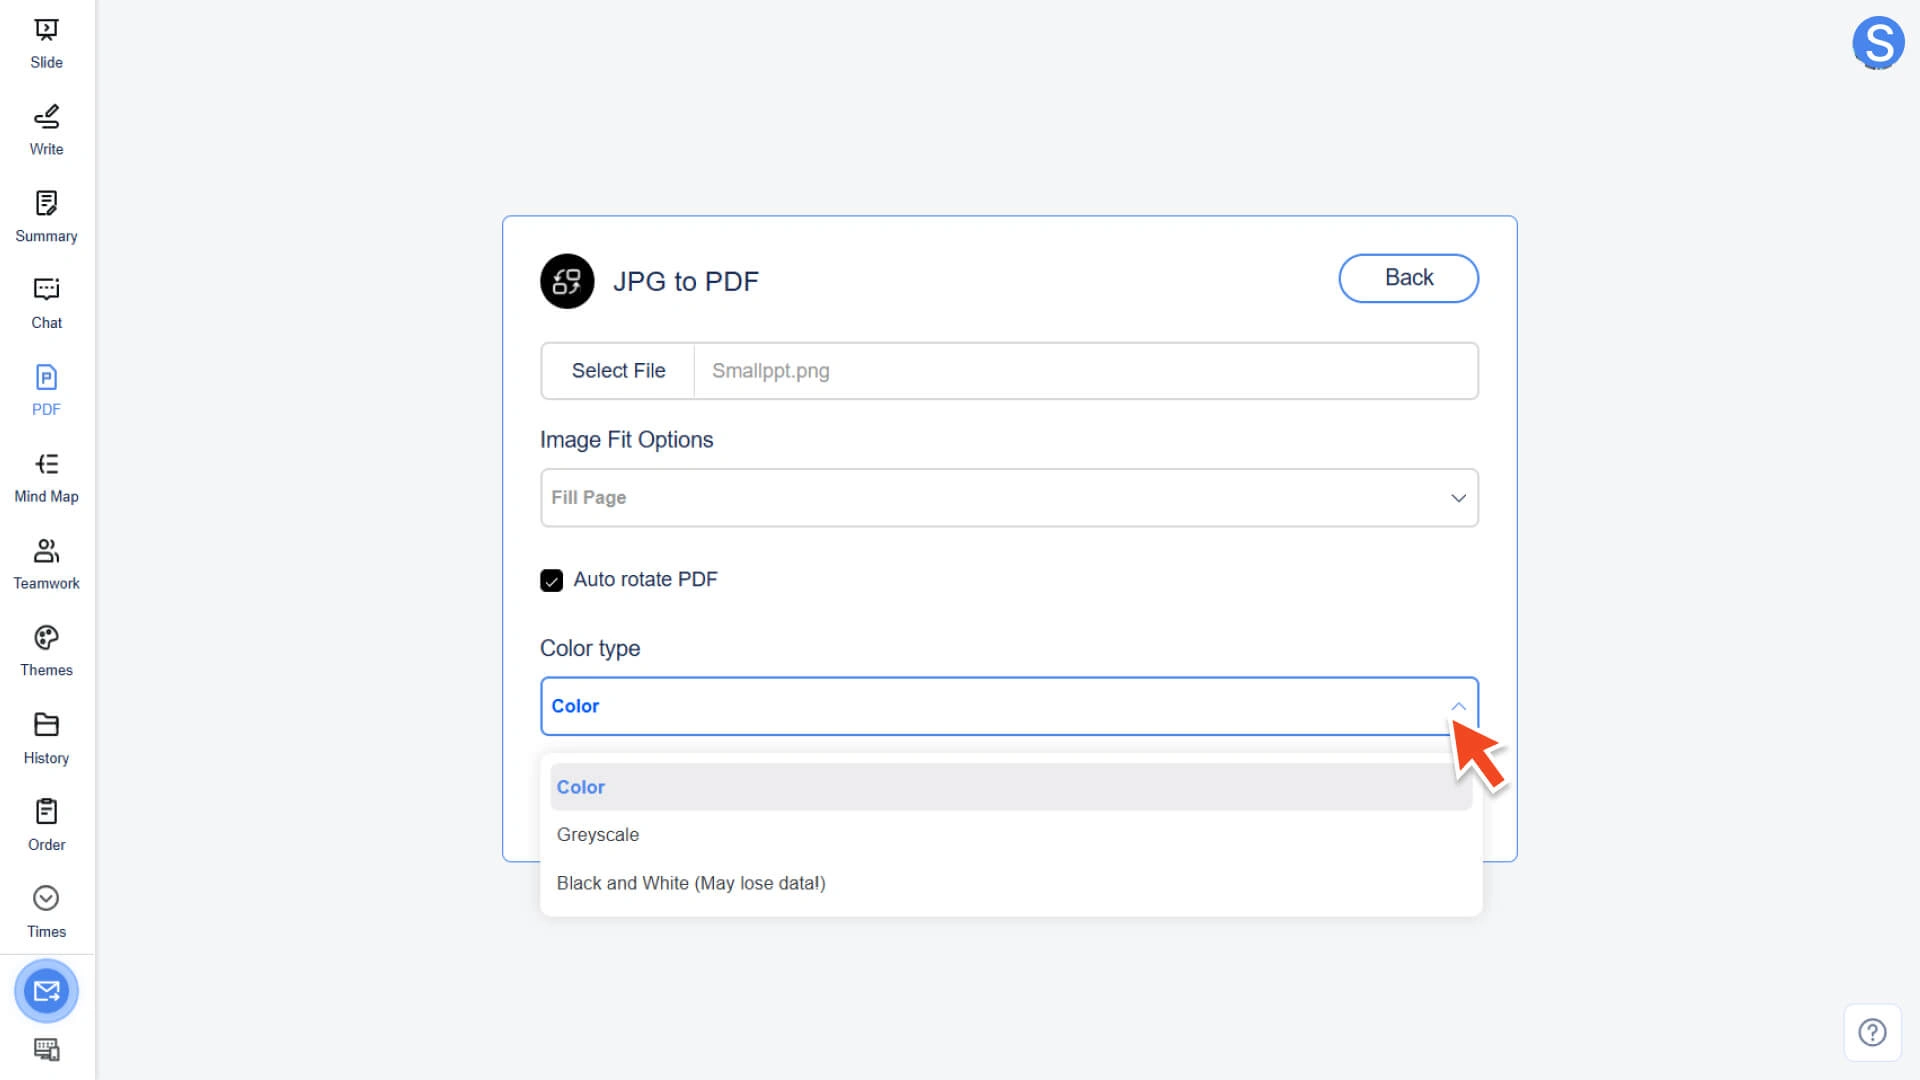
• Image Fit Options: Select how the image fits the page size (e.g., Fill Page / Fit Document To Image / Maintain Proportions)
• Auto-rotate PDF: Automatically adjust the PDF page orientation based on the image orientation
• Color type: Select Color, Grayscale, or Black and White (note that black and white may result in the loss of some image details)
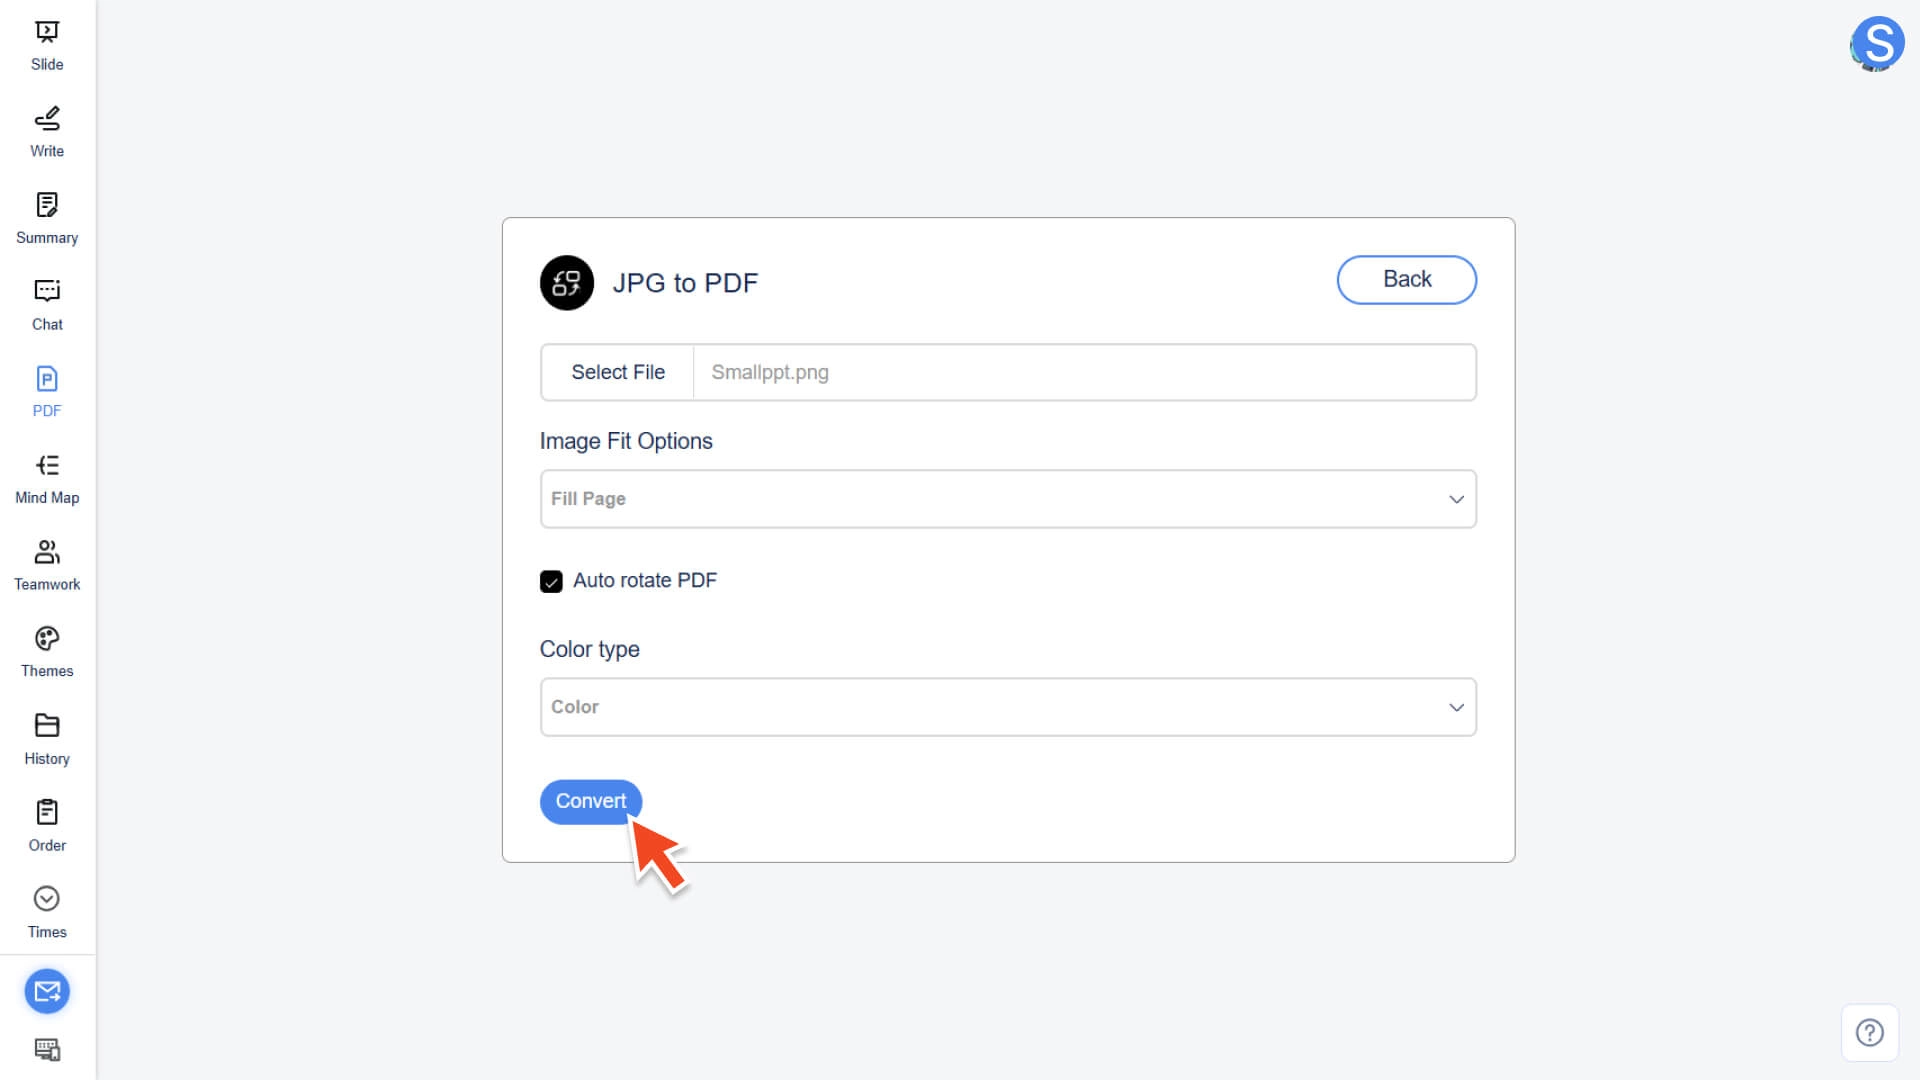
Step 4: Perform conversion and download
• Click the Convert button
• Once the system has completed the conversion, the generated PDF file can be downloaded
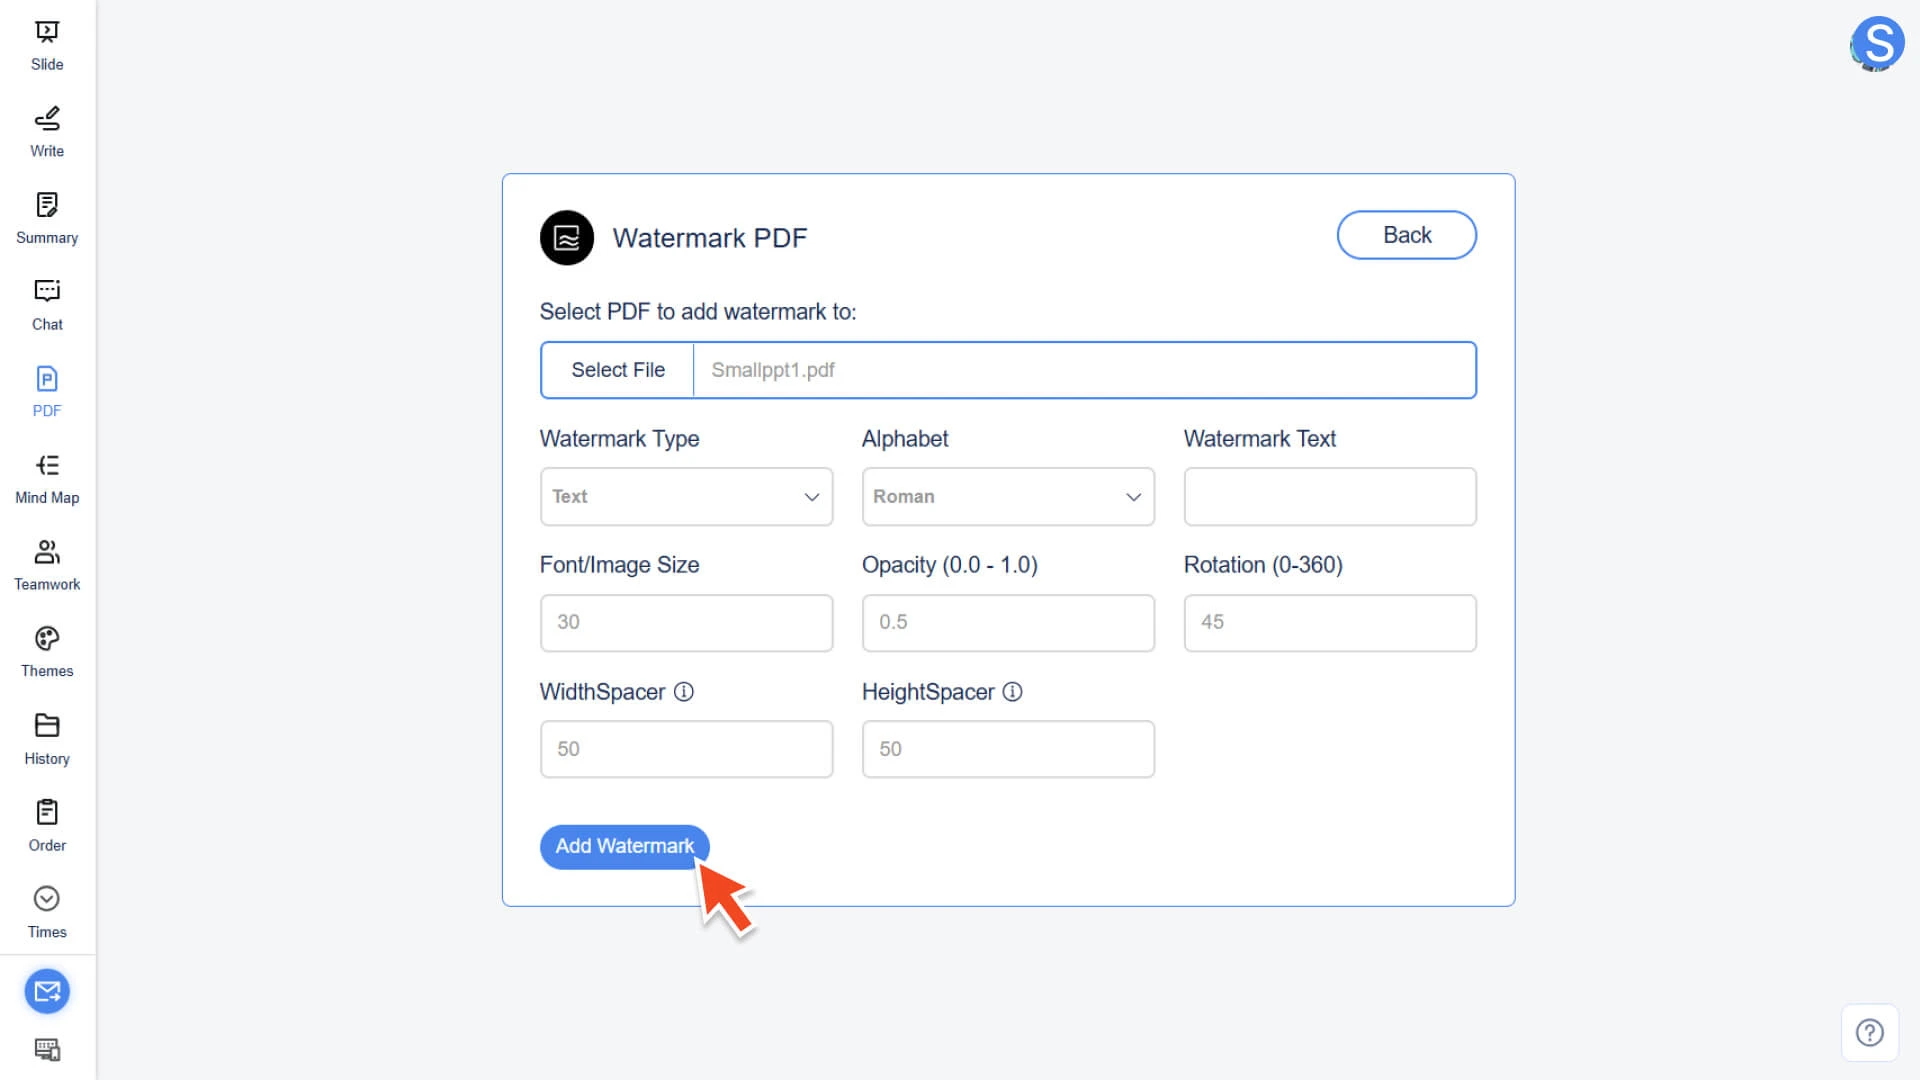
How to Add Custom Watermarks to PDFs
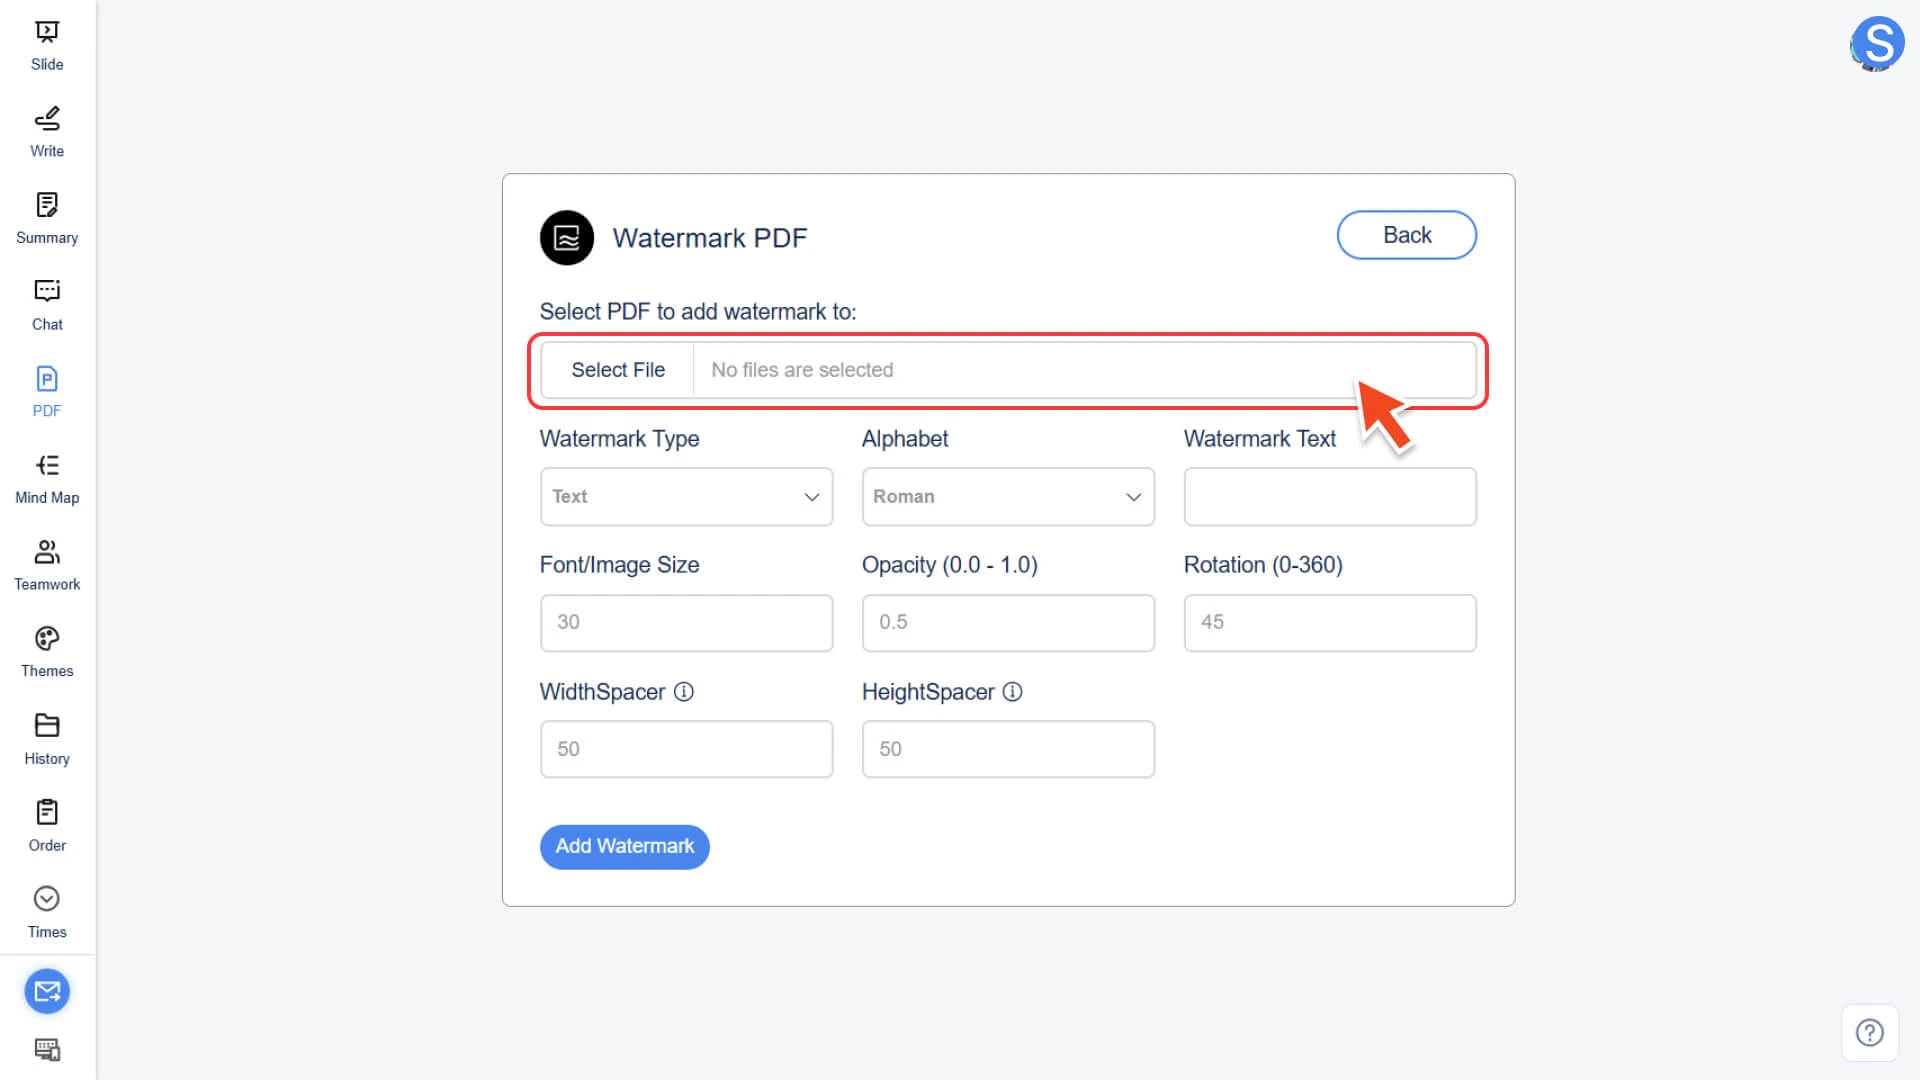
Step 1: Enter the watermark tool and upload the file
• Select the Watermark PDF feature in the AI PDF module.
• Click Select File to upload the PDF file that needs to be watermarked.
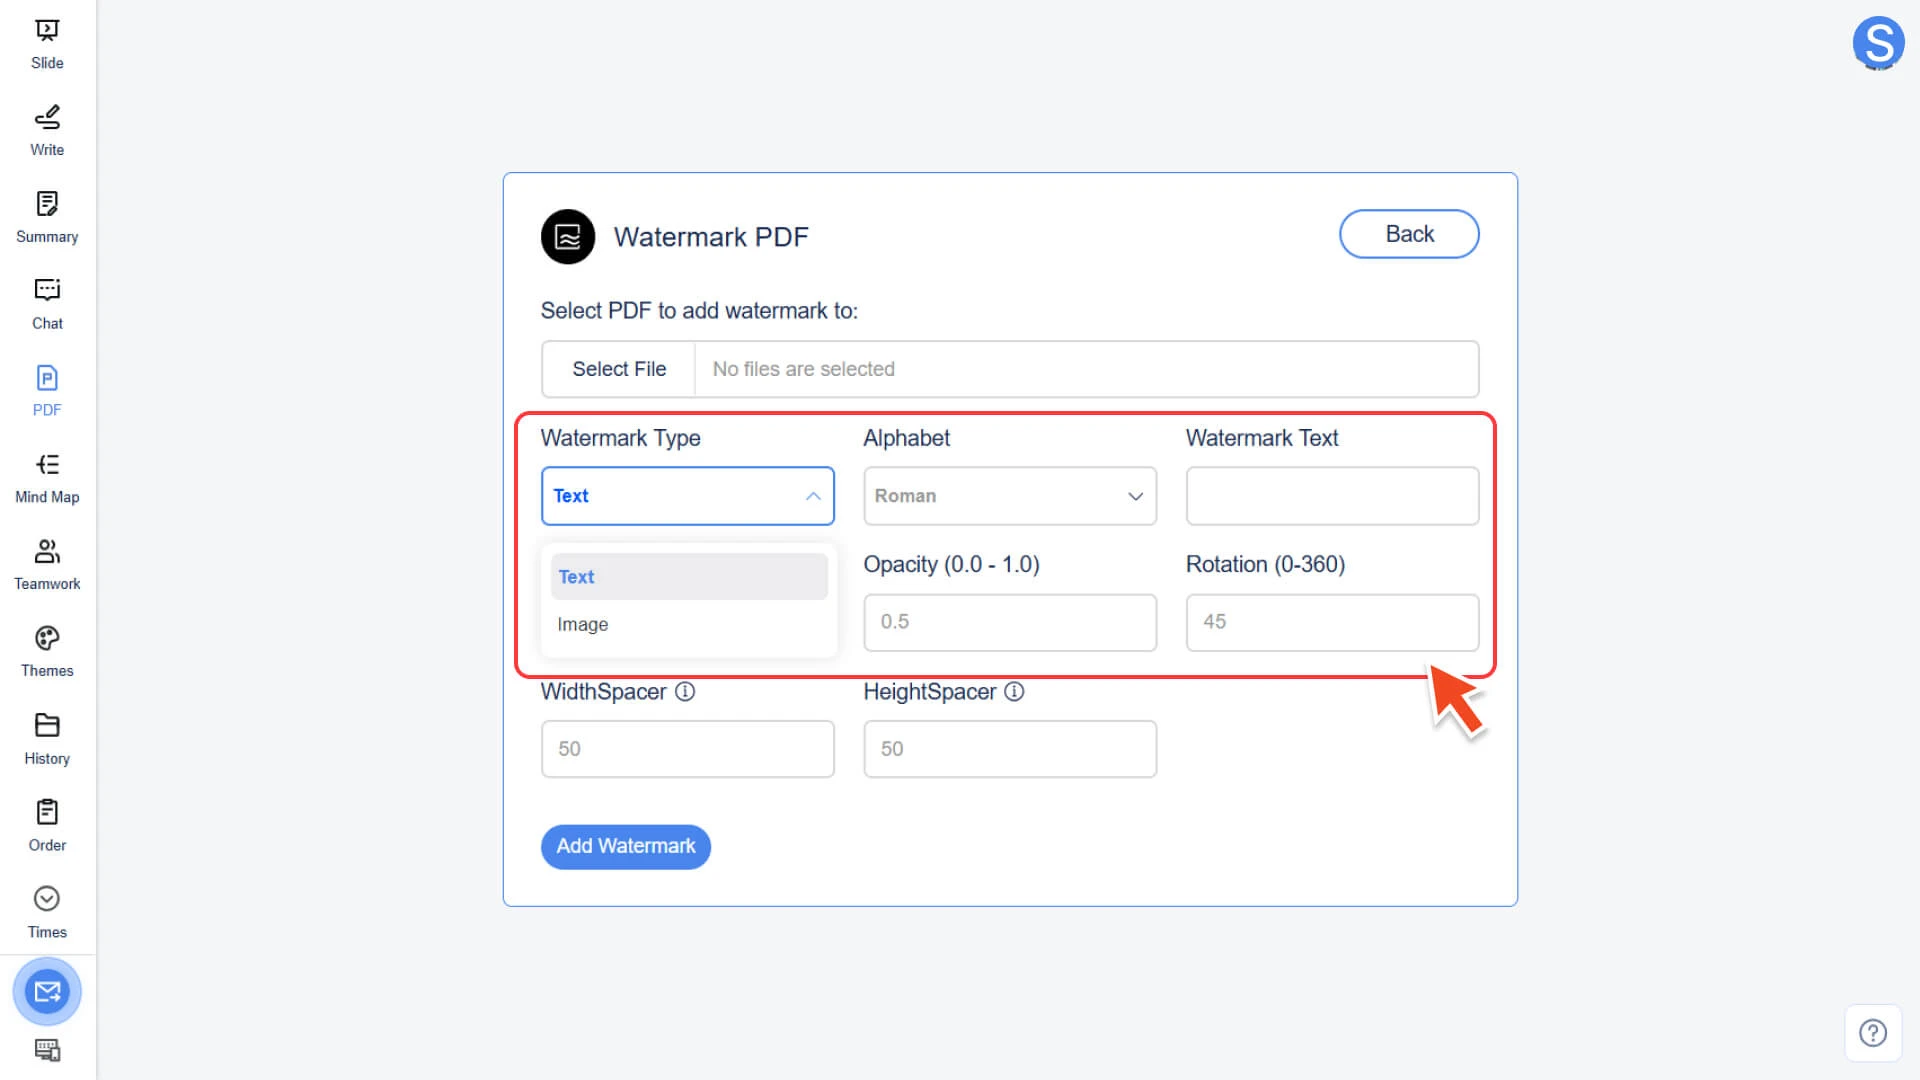
Step 2: Select the watermark type
You can choose one of the following two methods as the watermark source:
• Text Watermark: Directly enter the text to be added
◦ The system supports multiple languages, including English, Korean, Japanese, etc.
• Image watermark: Upload a pre-prepared image file as a watermark
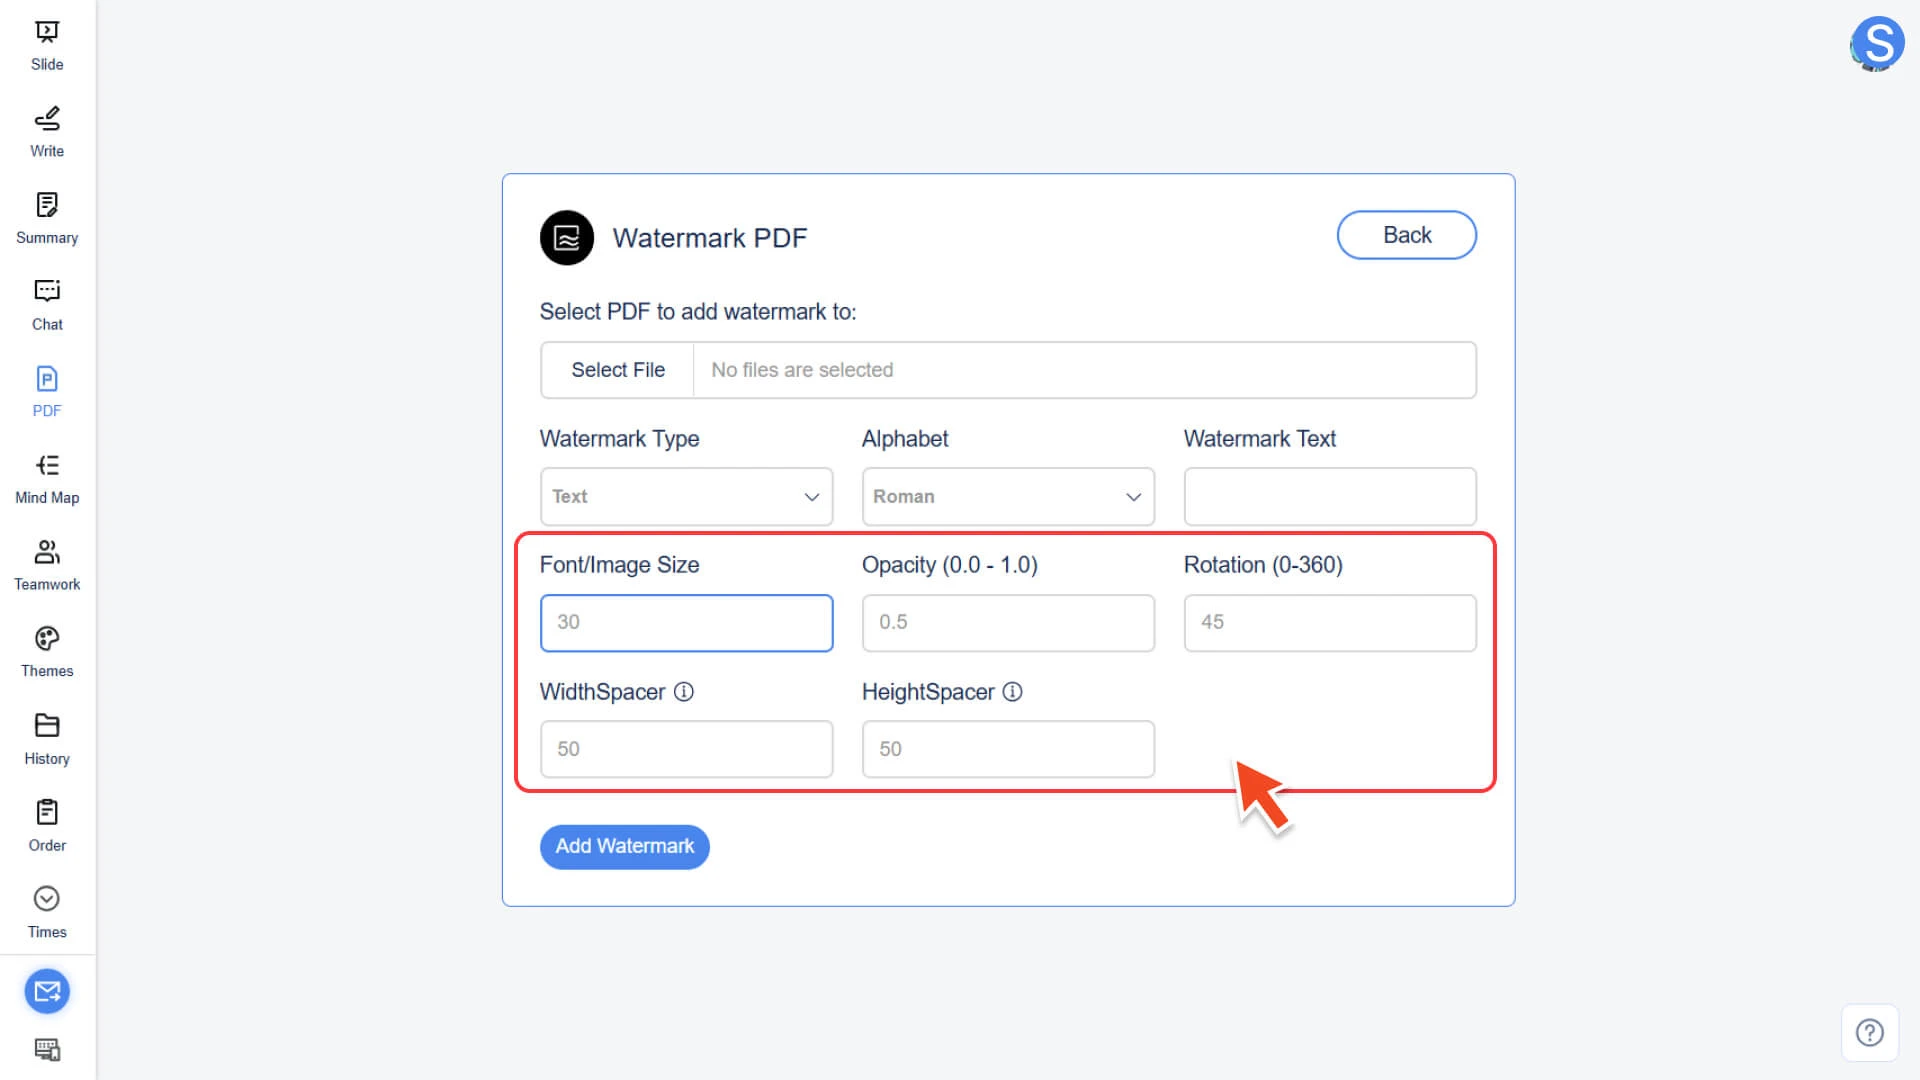
Step 3: Customize watermark parameters
Adjust the following parameters according to the requirements to achieve the best watermark effect:
• Font/Image Size: Adjust text font or image size
• Opacity (0.0 - 1.0): Adjust the transparency of the watermark (0.0 is fully transparent, 1.0 is fully opaque)
• Rotation (0 - 360): Adjust the rotation angle of the watermark
• Width/Height Spacer: Adjust the horizontal and vertical position spacing of the watermark on the page
Step 4: Perform the operation and export the file
• Click the Add Watermark button
• The system will immediately process and generate a PDF file with a custom watermark added
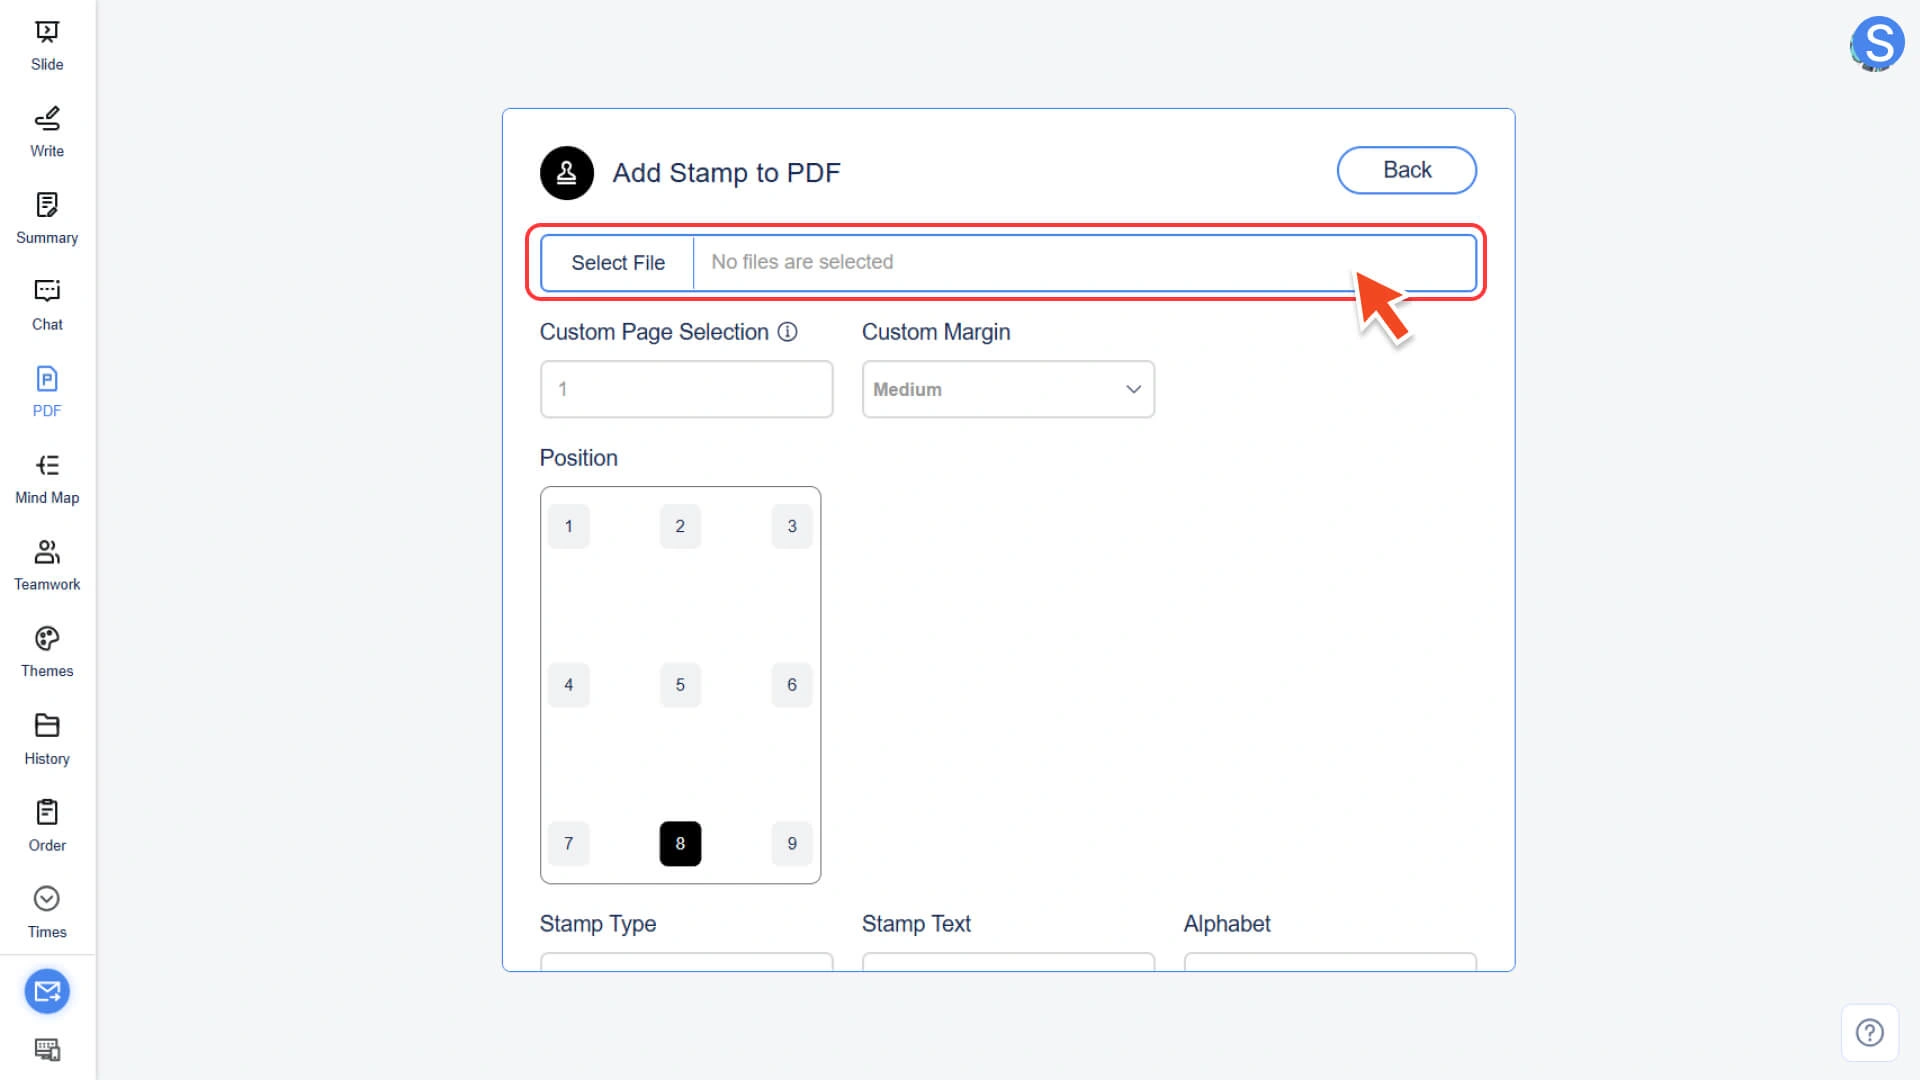
How to Add Text or Image Stamps in PDF
Step 1: Enter the seal tool and upload the file
• Select the Add Stamp to PDF function in the AI PDF module.
• Click Select File to upload the PDF file that needs to have a seal added.
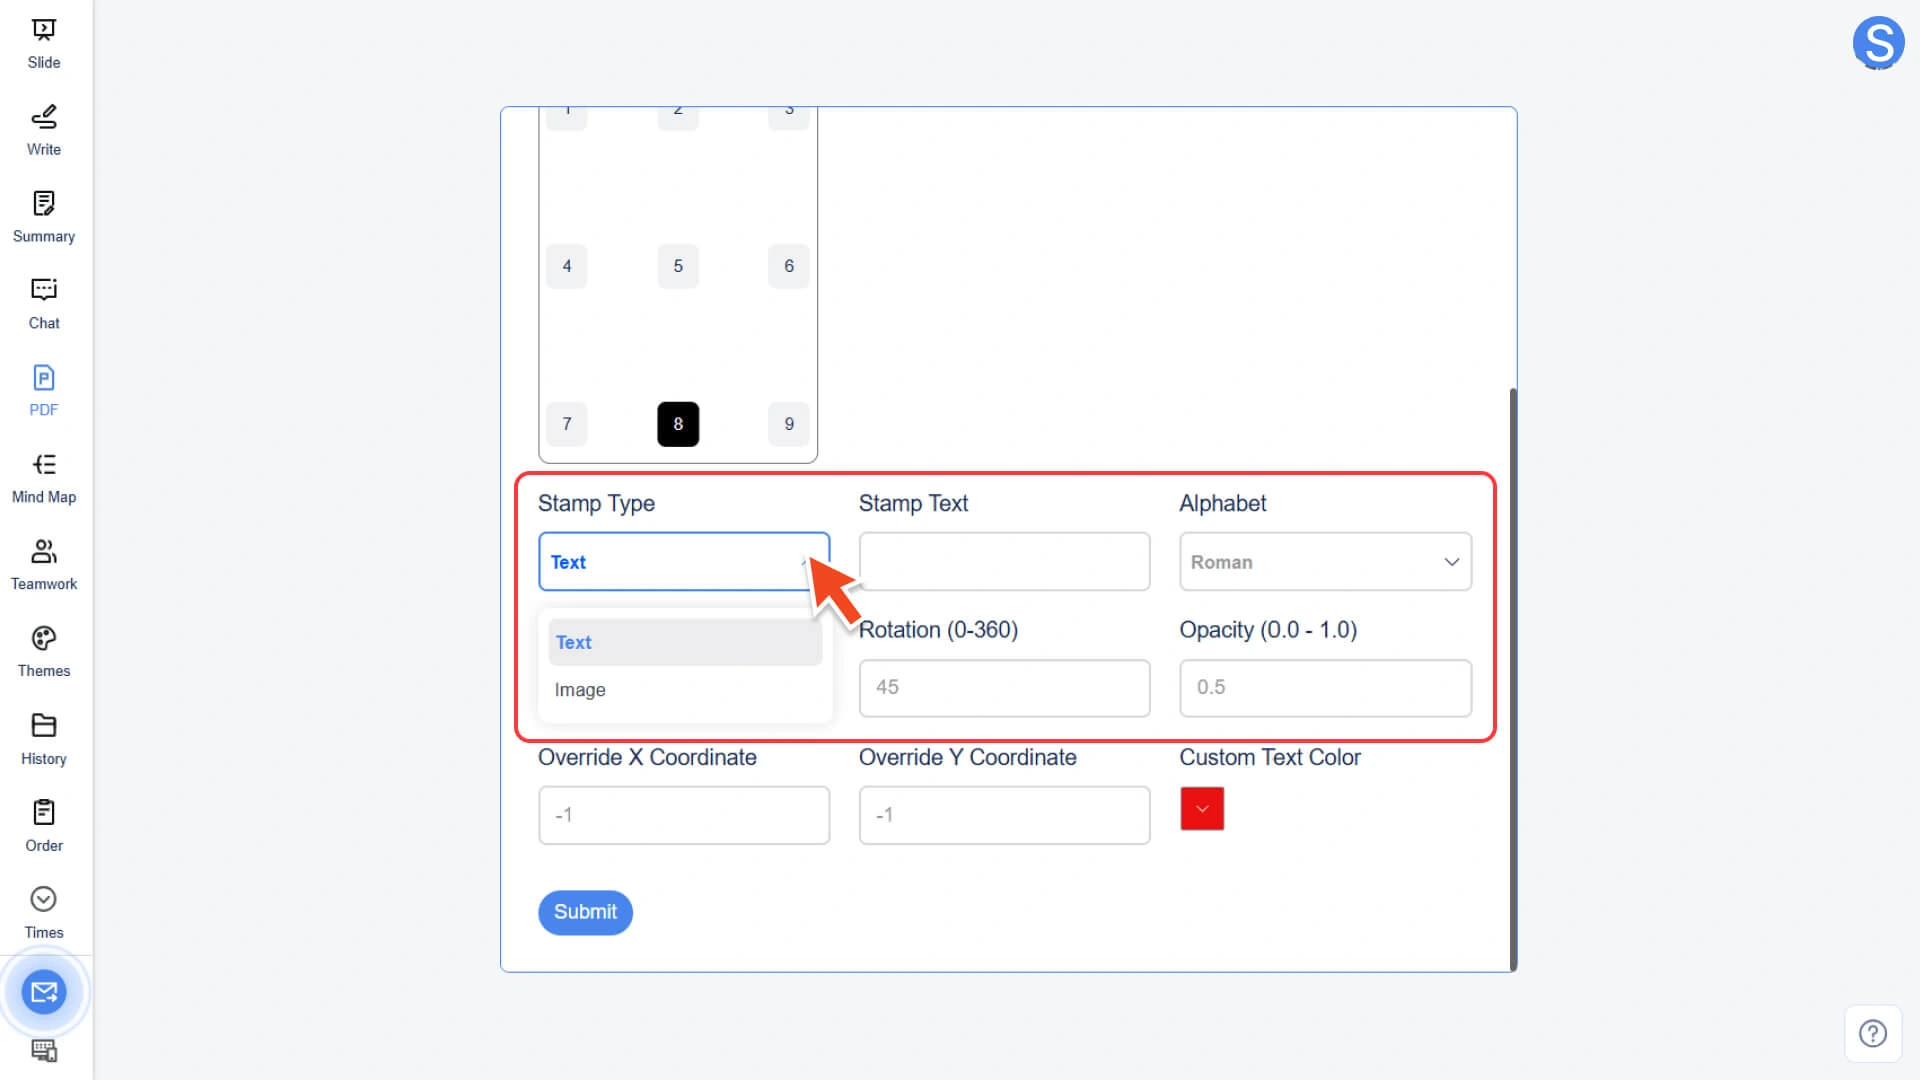
Step 2: Select and customize the seal type
• Text Seal: Customizable seal content and language.
◦ The system supports multiple languages, including English, Korean, Japanese, etc.
• Image Seal: Upload a prepared image file as the seal
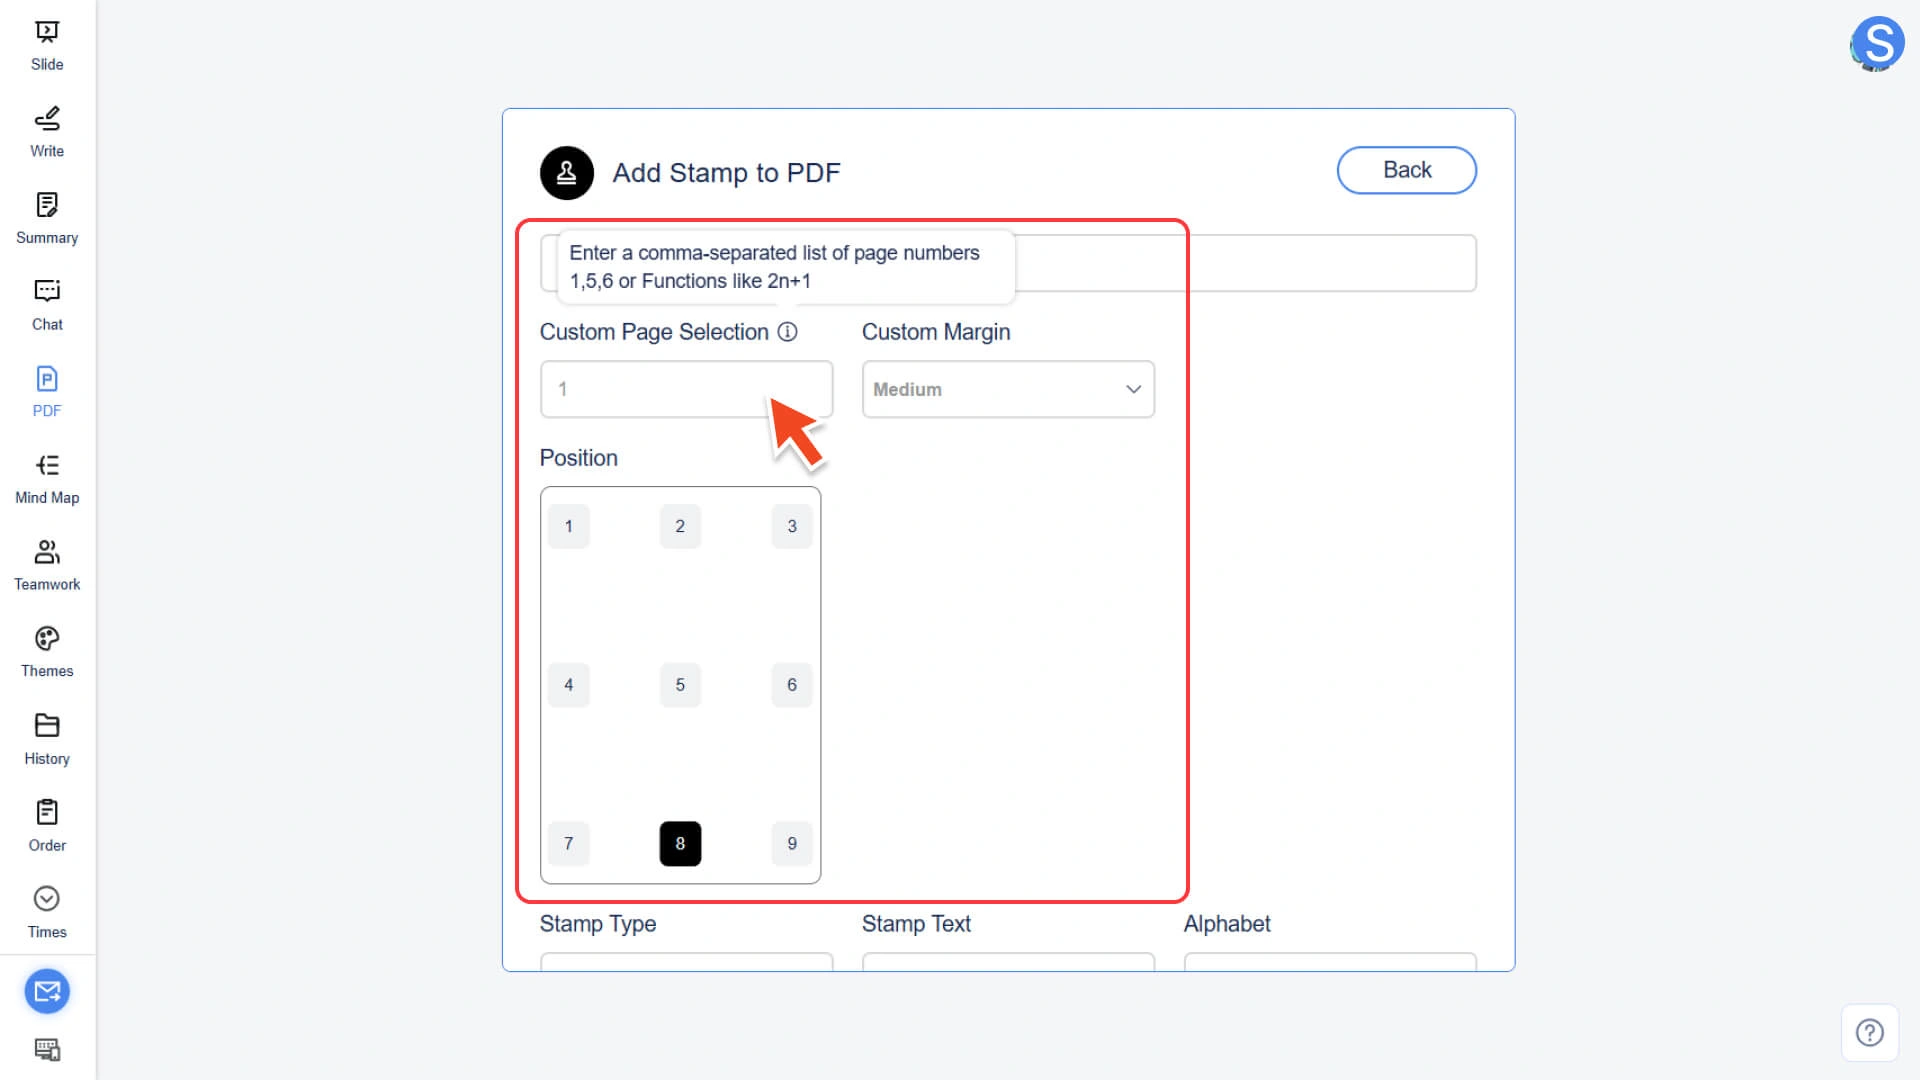
Step 3: Configure Seal Position and Page Settings
• Custom Page Selection: Enter specific page numbers (e.g., 1, 3, 5) or use a formula (e.g., 2n+1) to select odd/even pages
• Custom Margin: Sets the distance between the seal and the page edge (Small / Medium / Large / X-Large)
• Position: Select automatic positioning to a preset position, or use custom X/Y coordinates to precisely control the position
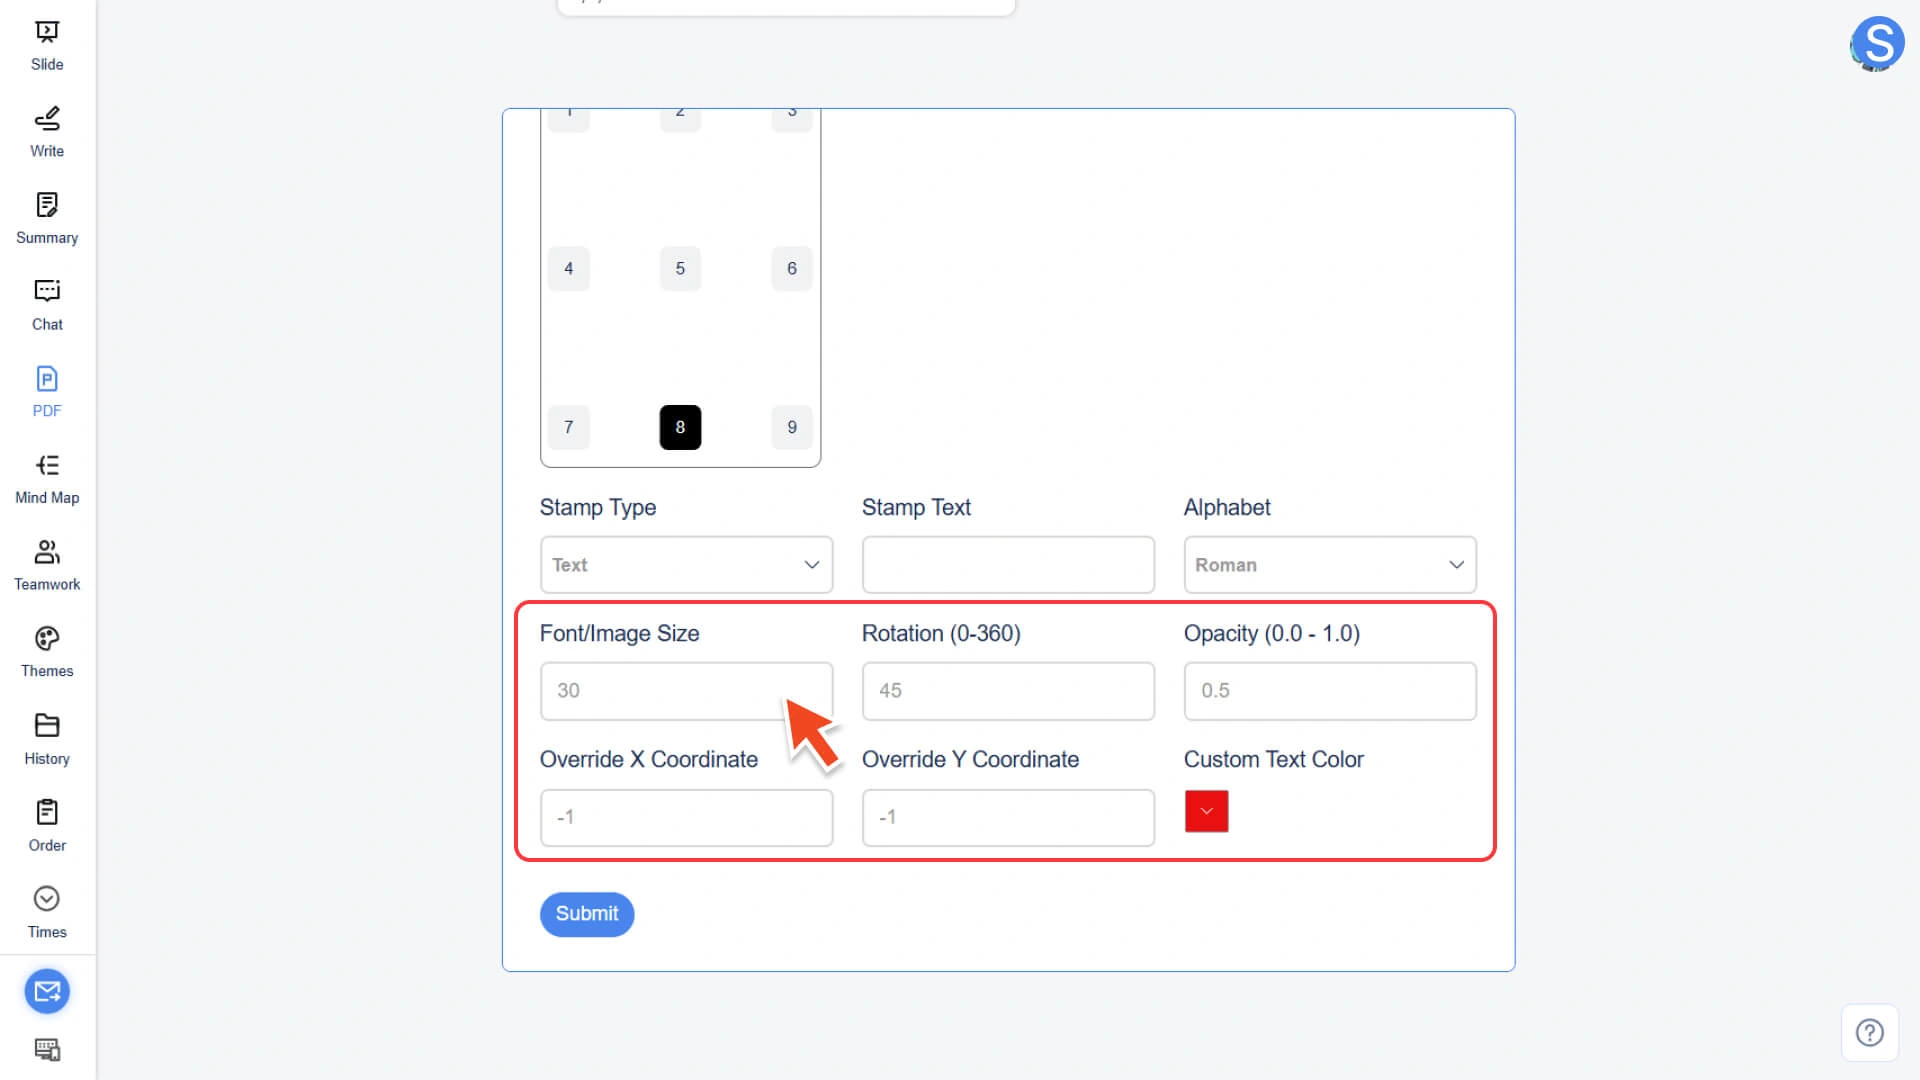
Step 4: Customize the Seal Appearance
• Font/Image Size: Adjust the size of text or images
• Rotation (0 - 360): Adjust the rotation angle of the seal
• Opacity (0.0 - 1.0): Adjust the transparency of the seal
• X/Y Coordinates: Precise Position Control
• Custom Text Color (Text Stamp Only): Customize text color
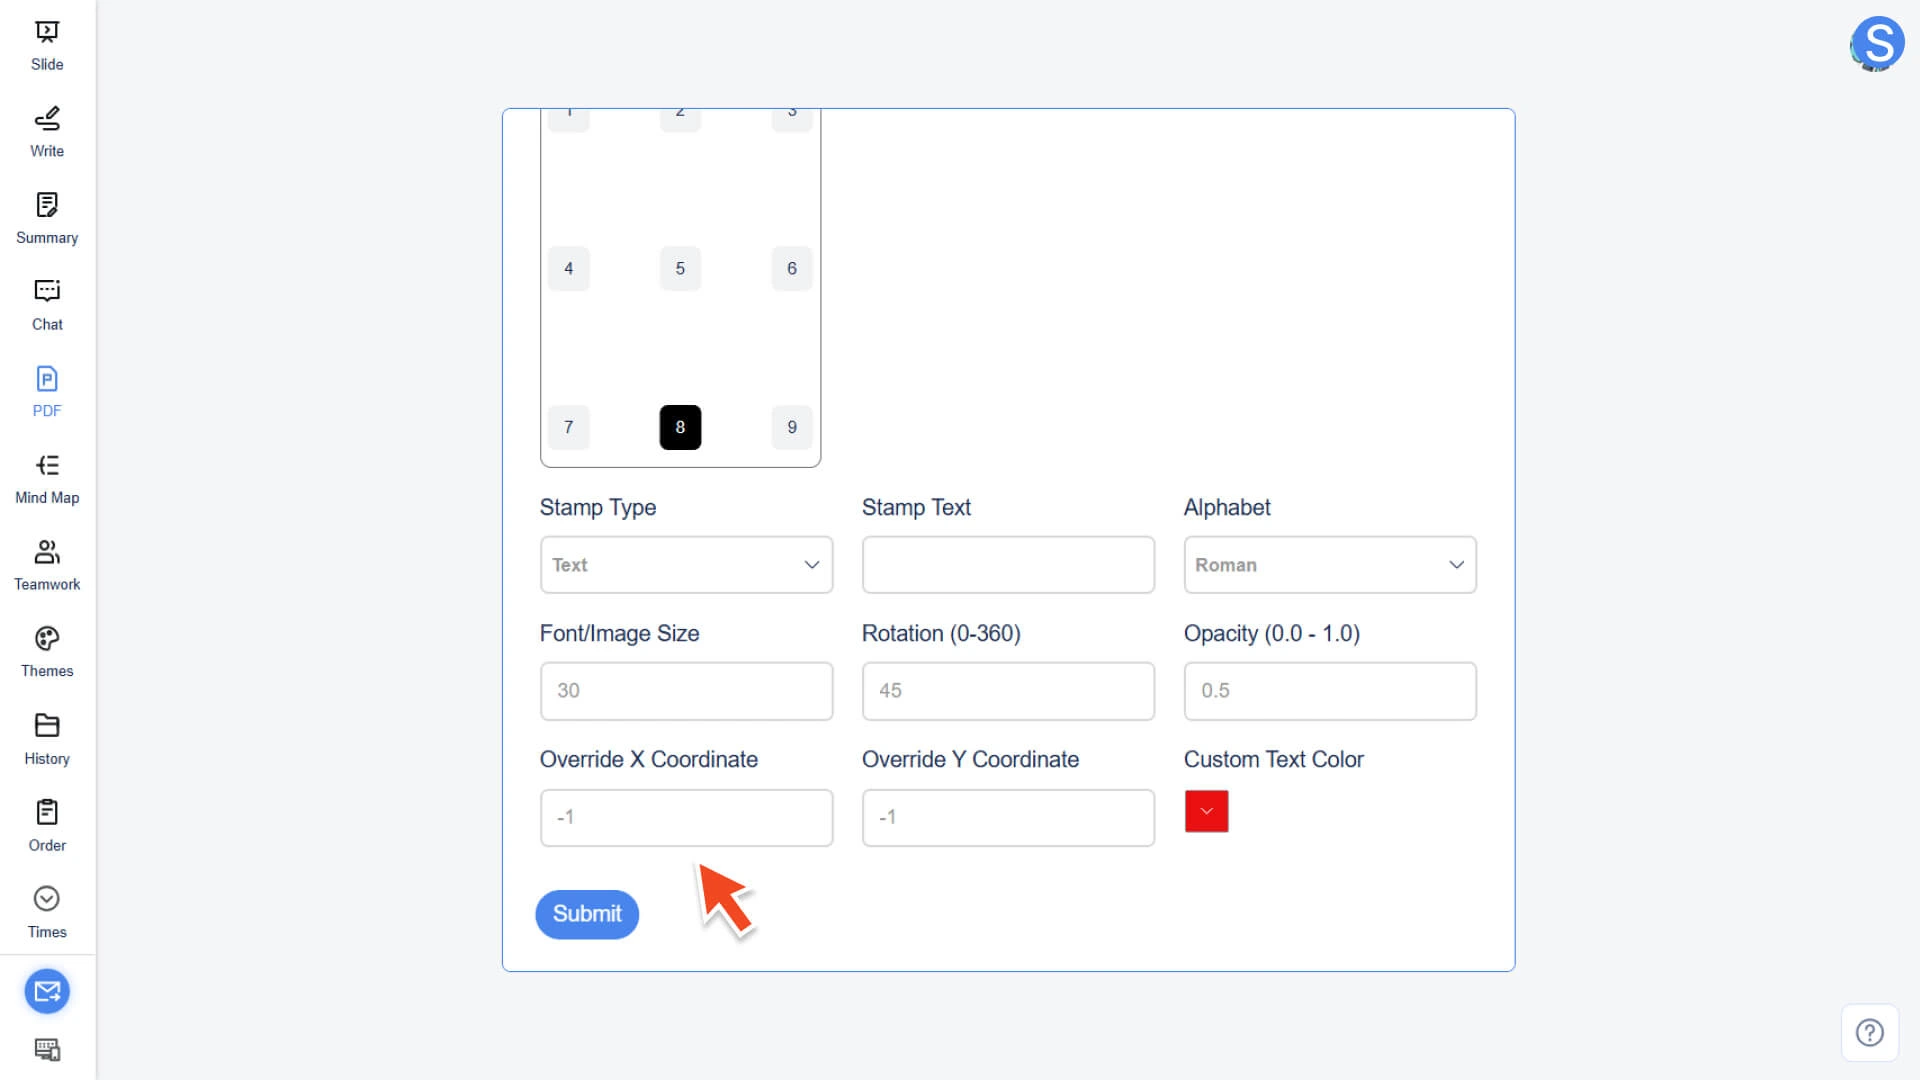
Step 5: Perform the operation and export the file
• Click the Submit button
• The system will process and export a PDF file with a custom stamp
How to Convert PDF to JPG
Step 1: Enter the conversion tool and upload the file
• Select the PDF to JPG function in the AI PDF module.
• Click Select File to upload the PDF file to be converted.

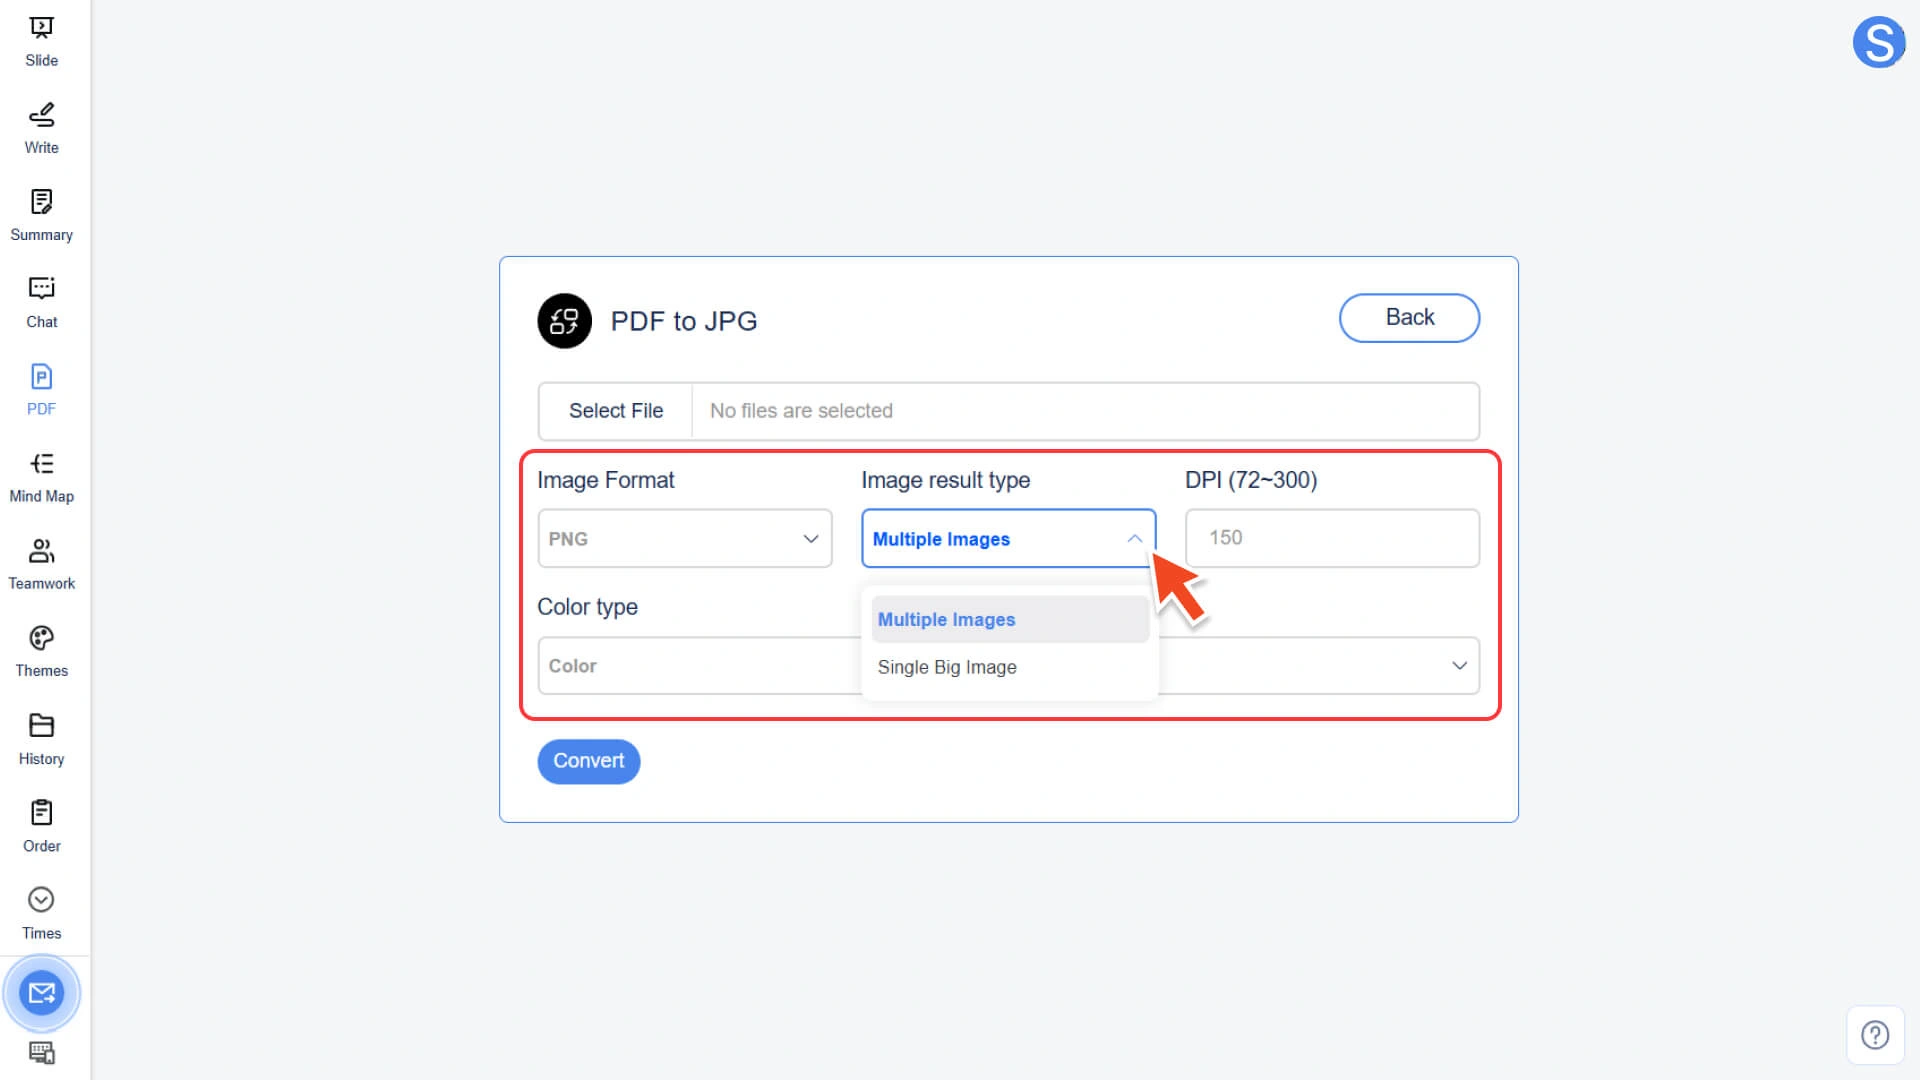
Step 2: Set conversion options and format
Customize output image parameters according to requirements:
• Image Format: Select the output format, supporting JPG, PNG, GIF, TIFF, BMP, etc.
• Image Result Type:
◦ Multiple Images: Convert each page of the PDF into a separate image
◦ Single Big Image: Merge the entire PDF document into a single long image
• DPI: Adjust the resolution of the output image, typically ranging from 72 to 300, with the option to customize a higher value
• Color Type: Select Color, Canary Release, or Black and White
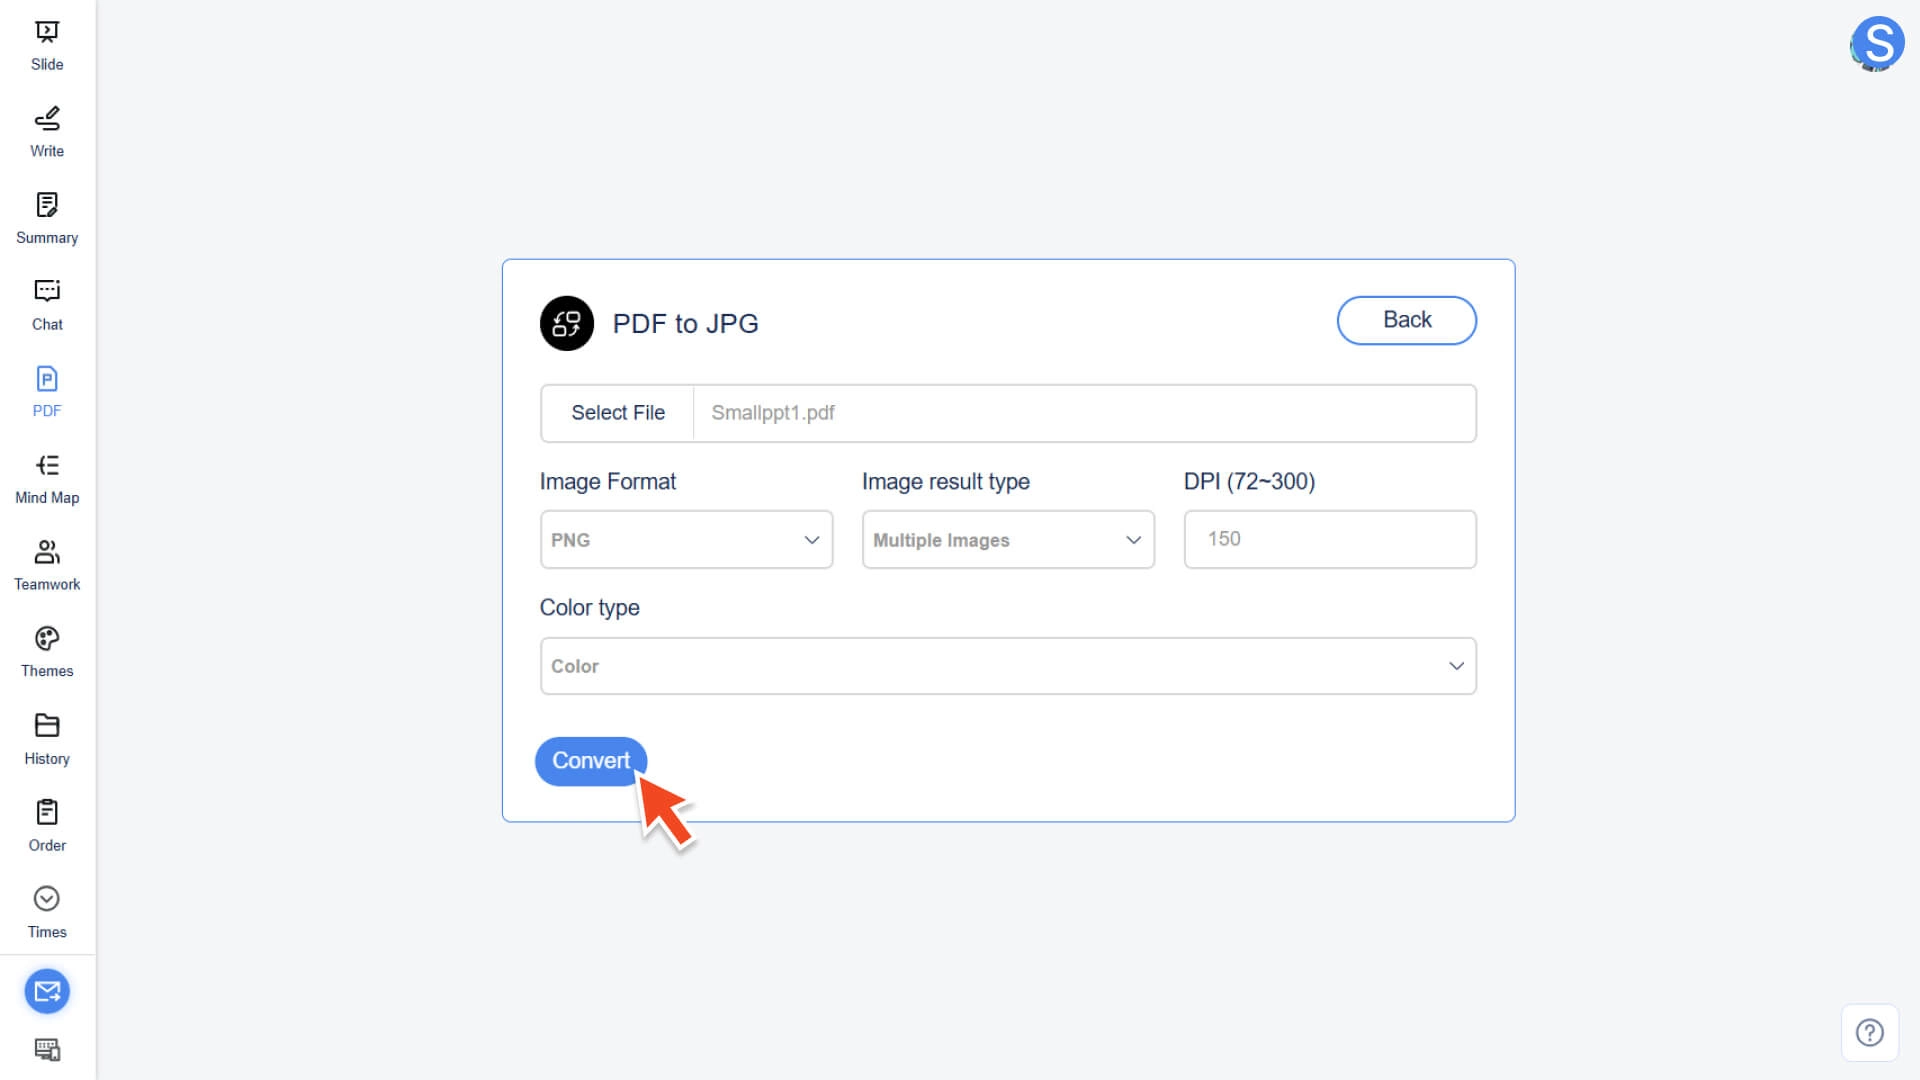
Step 3: Perform conversion and download
• Click the Convert button
• The system will start the conversion immediately
• Once completed, you can download the generated image file
Frequently Asked Questions
What is the maximum supported size for a single file?
- • Each file should be no larger than 10MB. If you need to process larger files, it is recommended to split or compress them before uploading.
Is the conversion operation safe?
- • All conversions are processed locally and will not be uploaded to third-party servers, ensuring content security.
Do I need to log in to use the PDF conversion feature?
- • You need to log in to your account to use all PDF conversion features.
Will the converted file be automatically saved?
- • Will not be automatically saved. After the conversion is completed, the system will trigger the local save window.
- • Please select the save path in the pop-up window and save it in a timely manner.
- • If the page is closed or the file is not downloaded, the converted file will not be retained in the account history.